Settlements
The settlements screen displays the financial information between vendors and store.
The settlements screen displays a list of the vendors connected to the store; click the vendor to view the settlements respectively.
Before entering the data in the various fields, please review the Field Validation section that is associated with the last sheet.

Transactions and Settlements are separated and shown in independent tabs.
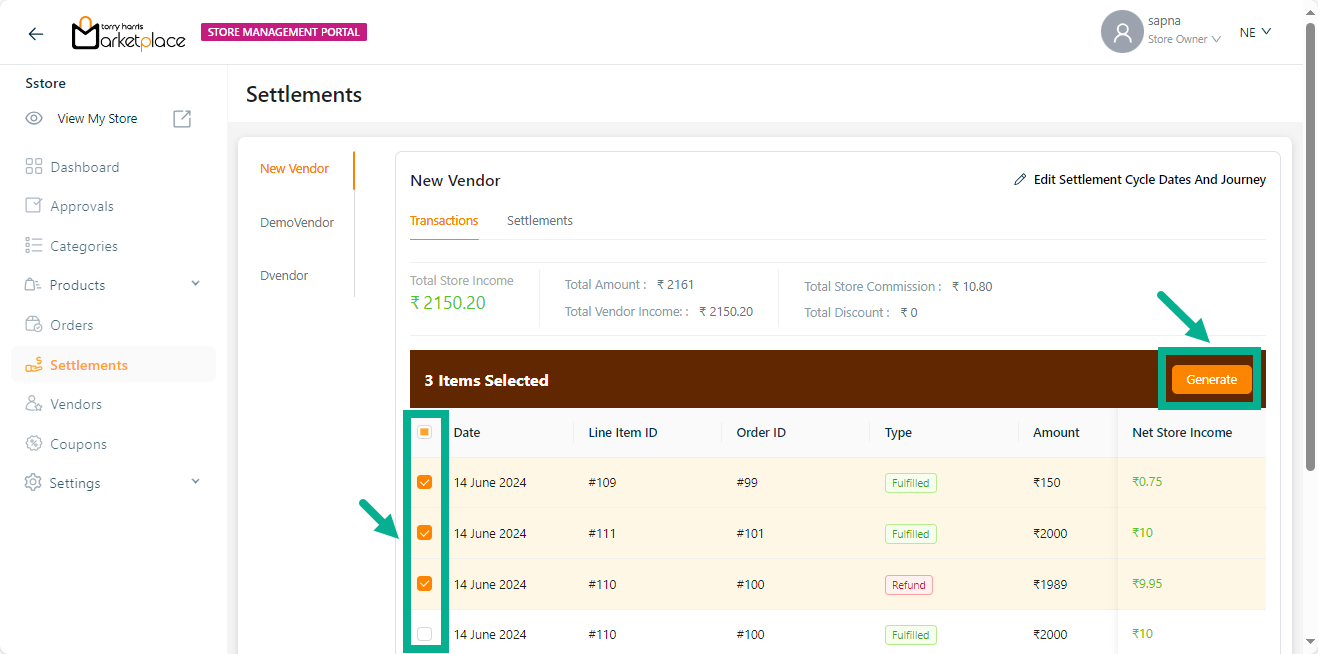
Transactions
The Transactions tab displays the transaction details for the respective vendor.
Generating Settlement Invoice
- Select the respective transaction and click Generate.
On generating, the confirmation message appears as shown below.
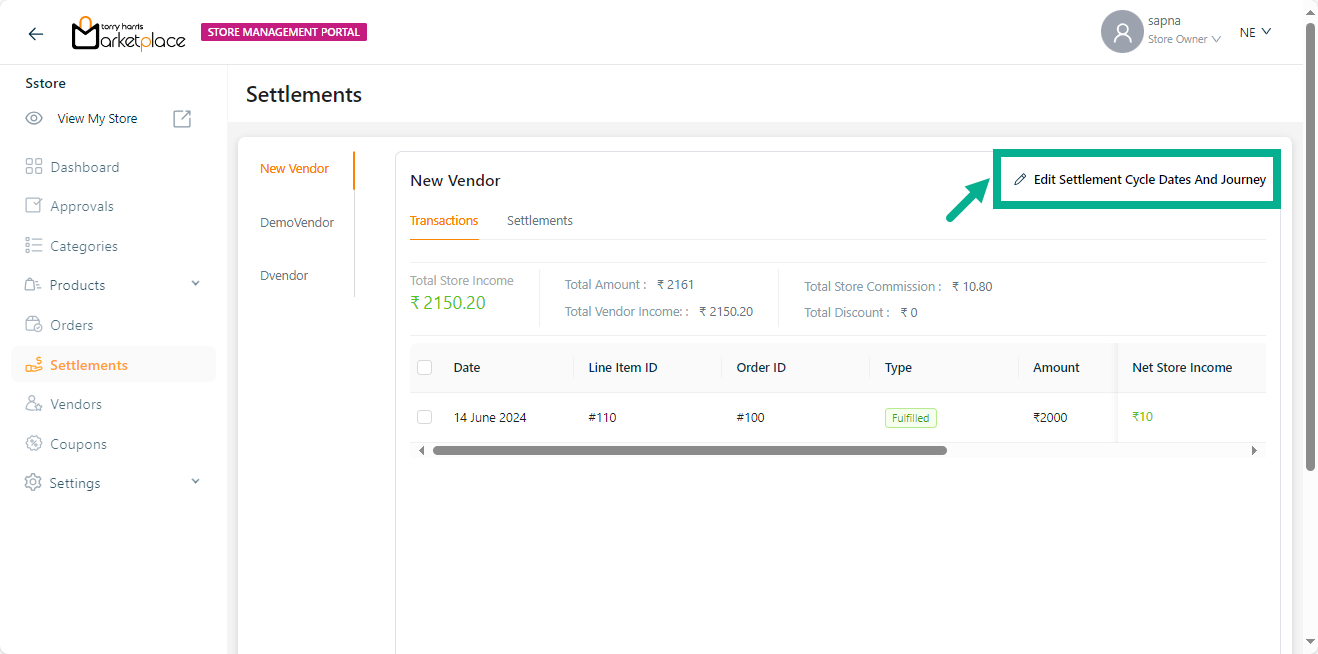
Editing Settlement Cycle Dates and Journey
- Click Edit Settlement Cycle Dates And Journey.
The respected vendor screen appears as shown below.
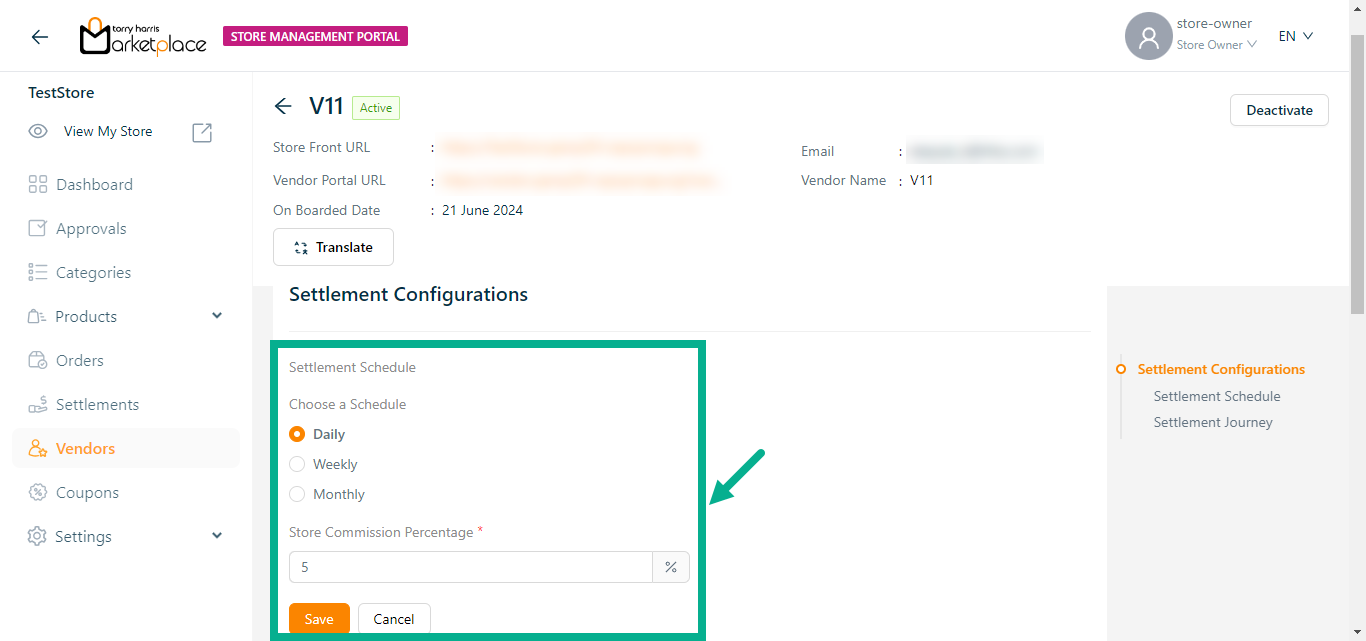
Click the Translate to update the Vendor Name if necessary.
- Choose a Schedule.
The Settlement screen may change based on the scheduler selection.
For example, if the user chooses the weekly scheduler, an invoice for the week will be generated in the past settlements tab.
Enter the Store Commission Percentage.
Click Save.
On saving, the confirmation message appears as shown below.
Settlement
The Settlement tab displays the settlement details of the respective vendor.
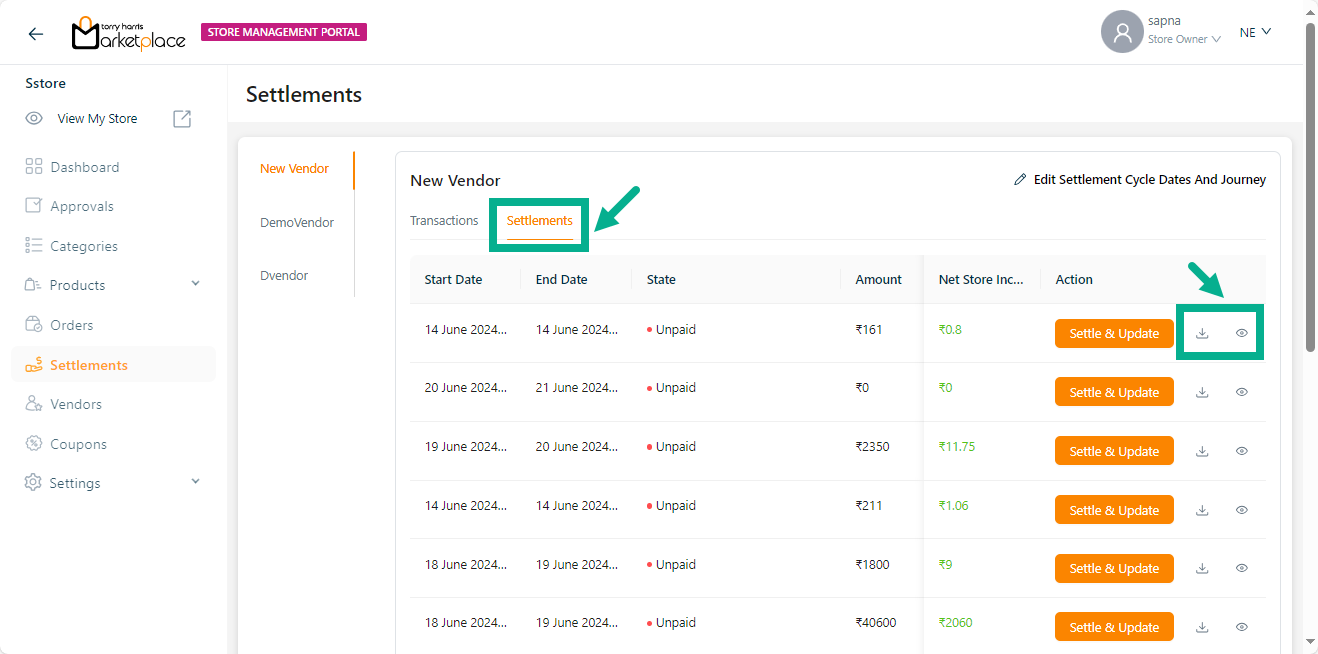
Click the Download icon to download the respective invoice if necessary.
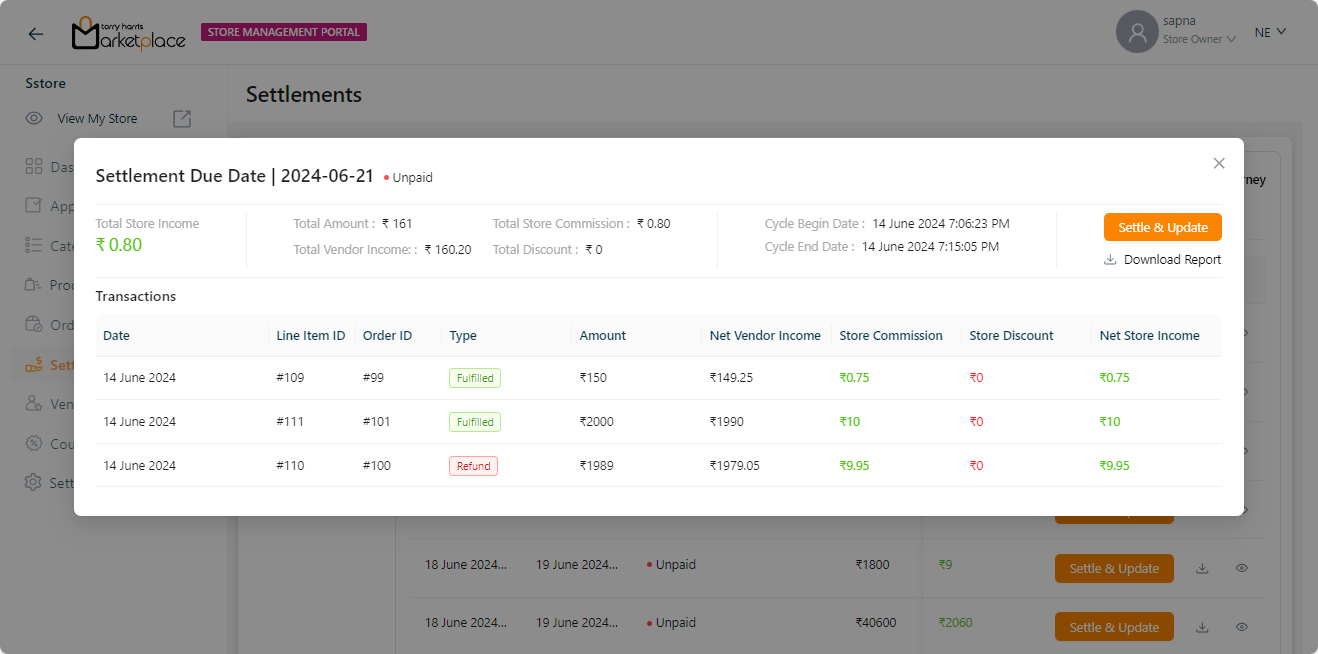
- Click the View icon to view the detailed report of the respective settlement.
The dialogue box appears with the respective details as shown below.
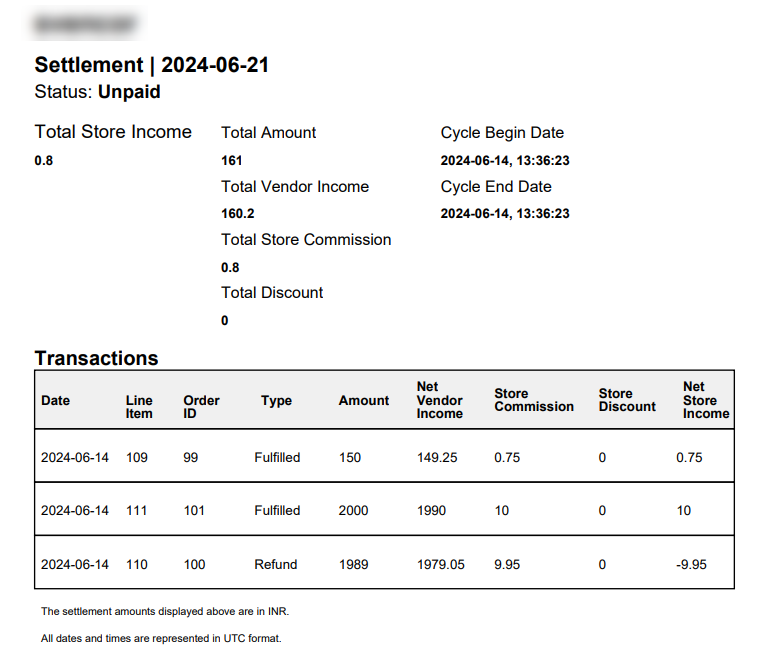
- Click Download Report to download the report to your local drive.
On downloading, the confirmation message appears as shown below.
- Downloaded Report appears with the respective details as shown below.
Settling & Updating the settlement
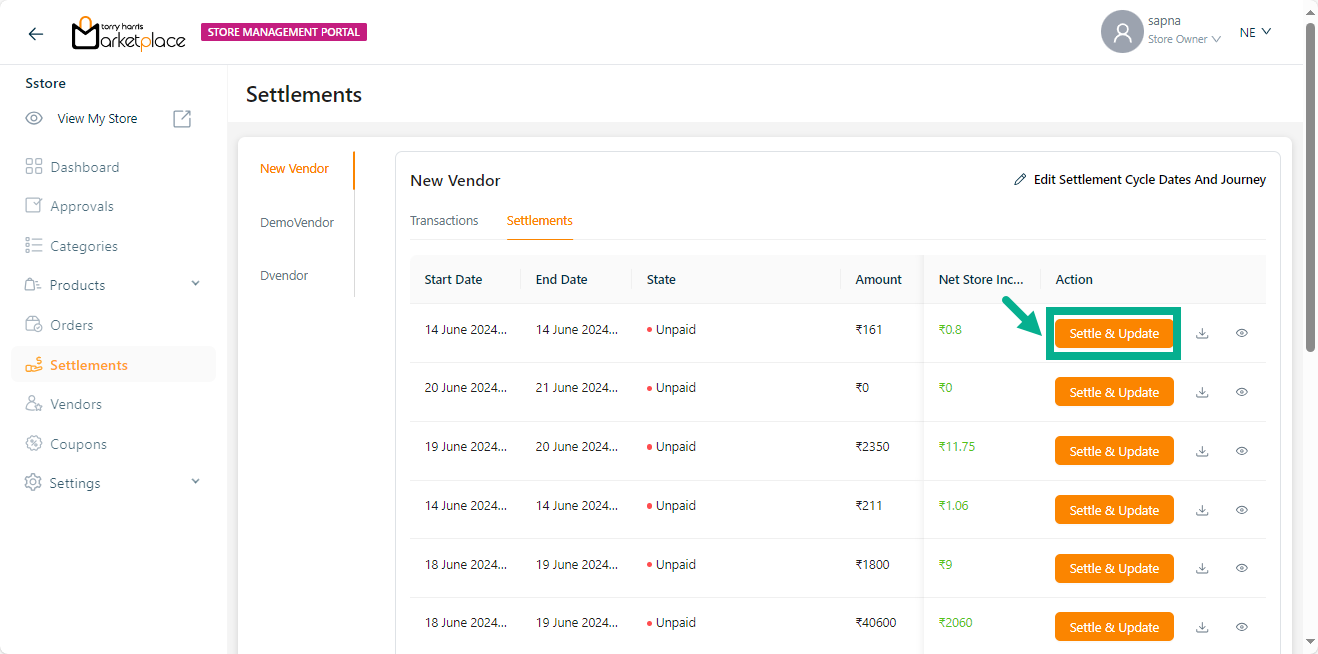
- Click Settle & Update.
The dialogue box appears as shown below.
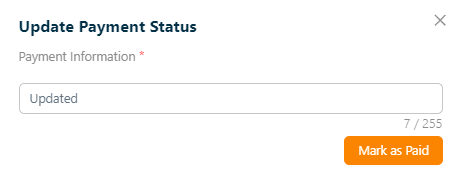
Enter the Payment Information.
Click Mark as Paid.
On updating, the confirmation message appears as shown below.