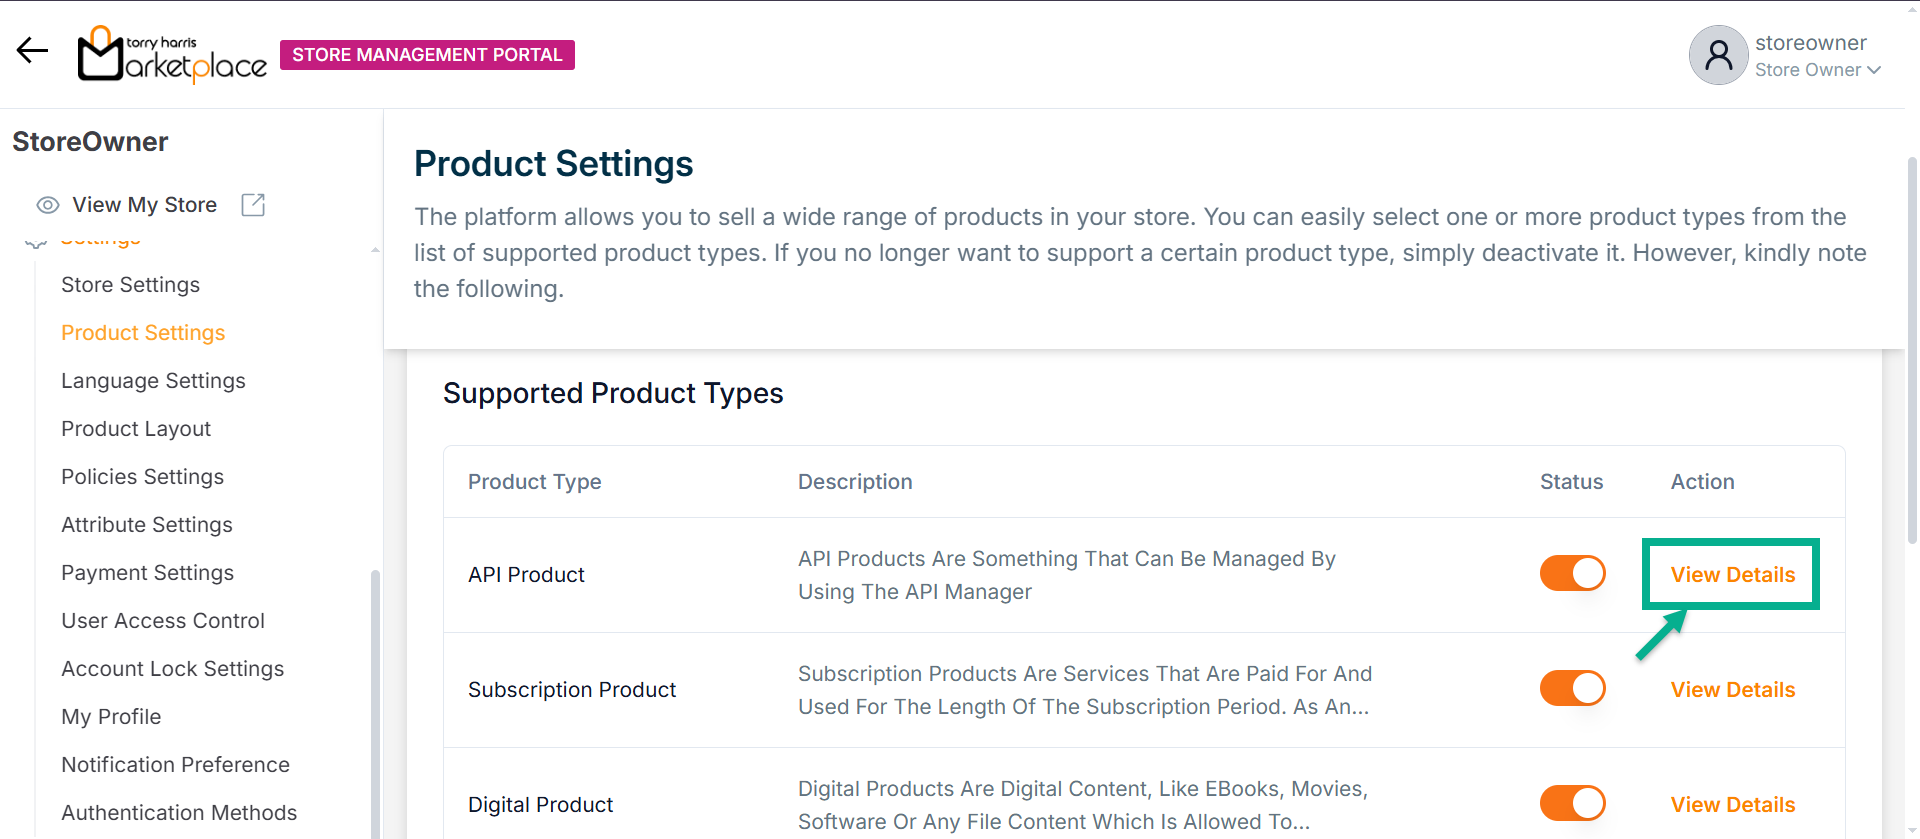
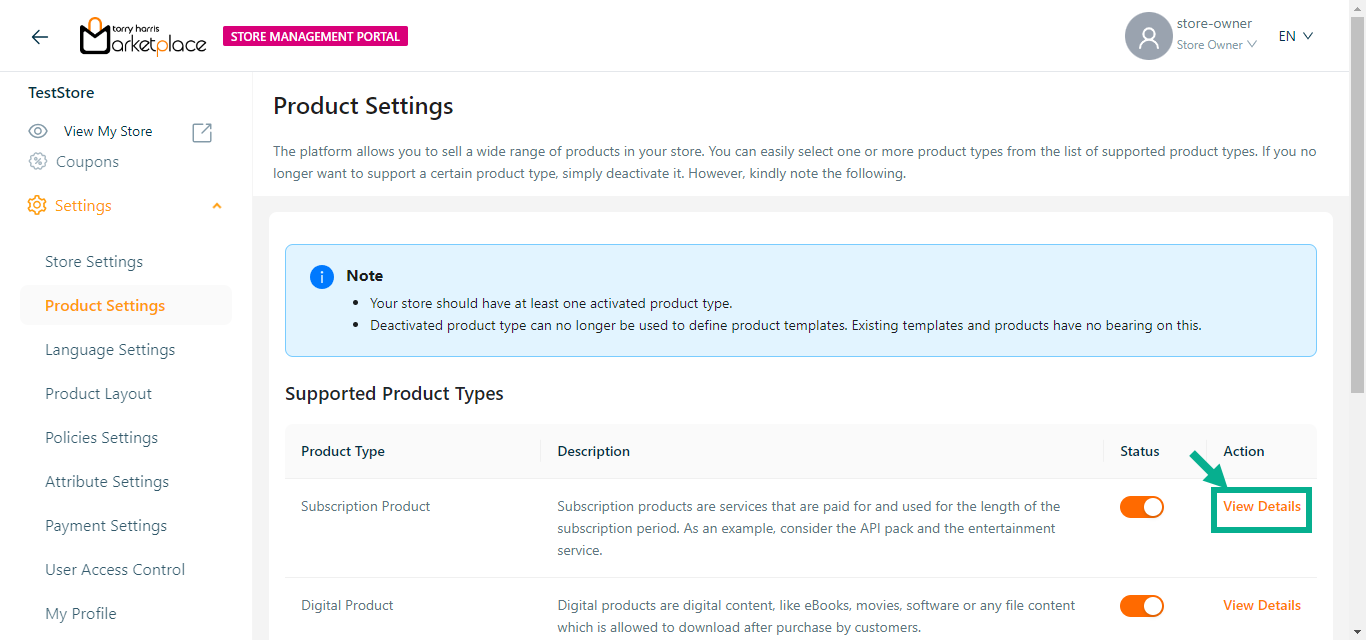
Product Settings
You can easily select one or more product types from the list of supported product types. If you no longer want to support a certain product type, simply deactivate it.

The list of product type supported are as follows:
API Product - API products are managed and exposed through an API Manager, allowing developers or partners to consume functionalities via APIs in a controlled and secure manner.
Subscription Product - Subscription products offer ongoing access to services or content for a recurring fee over a specified period. Examples include API packs or entertainment services.
Digital Product - Digital products are intangible goods such as eBooks, software, or media files that can be downloaded by customers after purchase.
Service Product - Service products involve scheduling or booking a service provided by professionals, such as cleaning, consultation, or entertainment services.
Bundled Product - Bundled products combine multiple active items into a single package that is sold and marketed as one unified product offering.
Physical Product - Physical products are tangible goods that require shipping or delivery to the customer’s address, such as electronics, furniture, or groceries.
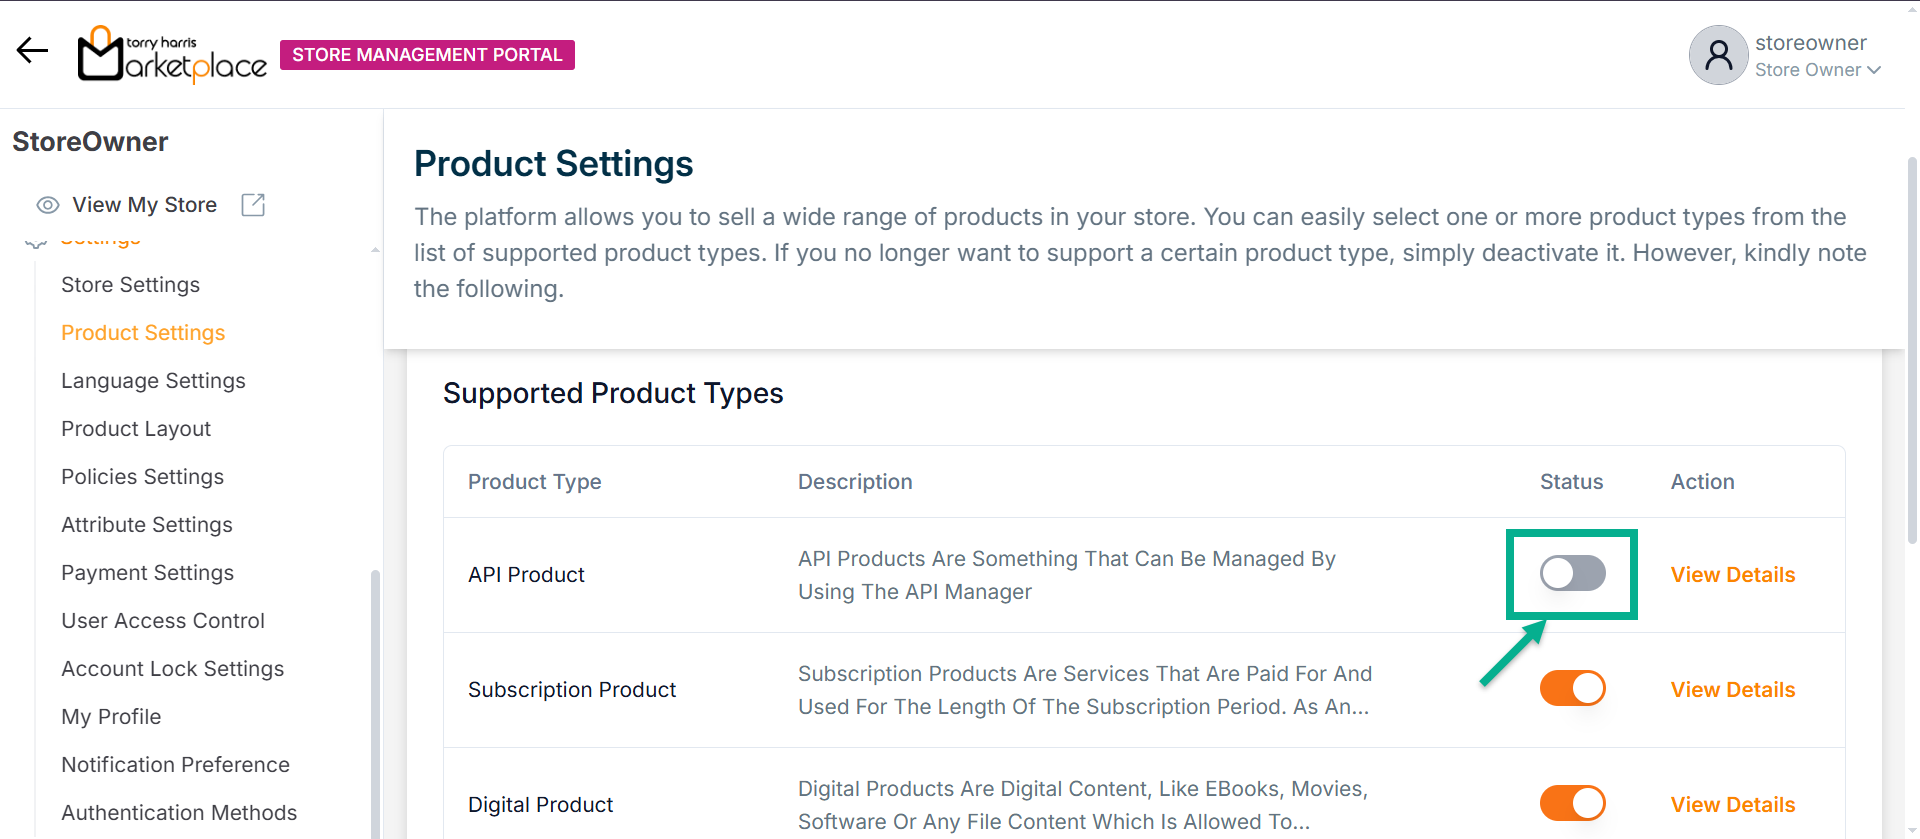
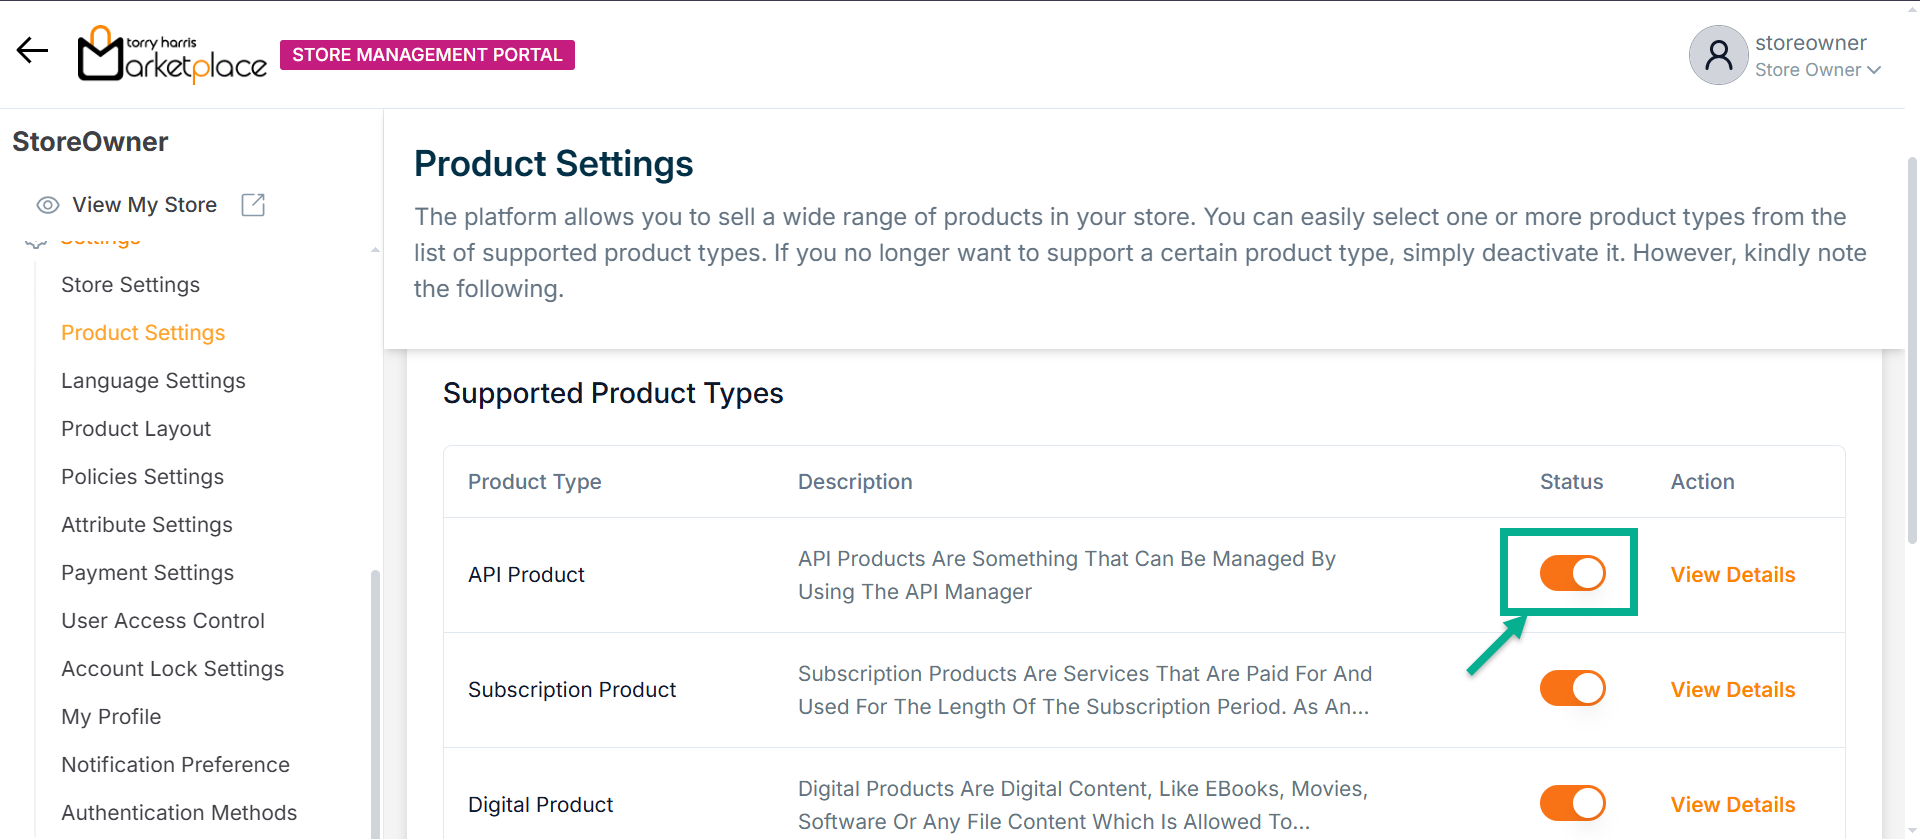
At least one Product Type needs to be Active in your store.
Activating a Product Type
- Enable the Status toggle of the product type that needs to be enabled.
The Product Activation dialogue box appears as shown below.
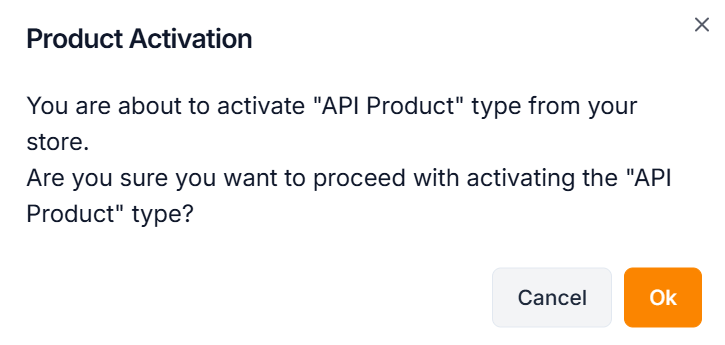
- Click Ok.
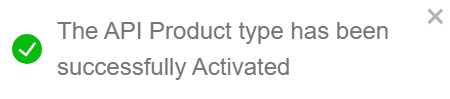
On activating, the confirmation message appears as shown below.
Deactivating a Product Type
- Disable the Status toggle of the product type that needs to be disabled.
The Product Deactivation dialogue box appears as shown below.
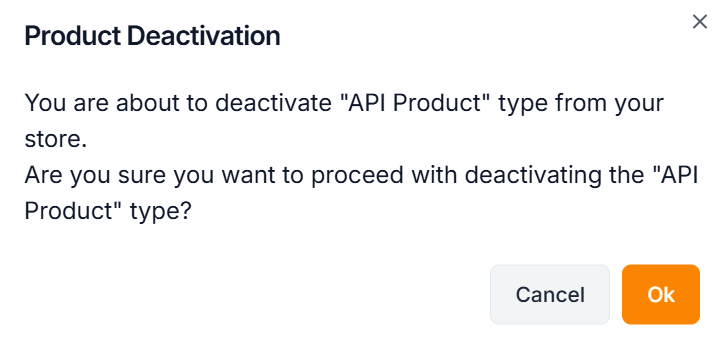
If the user deactivates a product type in the store management portal, the items created under that product type disappear. Once the product type is activated, the products created under that product type appear as they are.
- Click Ok.
On deactivating, the confirmation message appears as shown below.

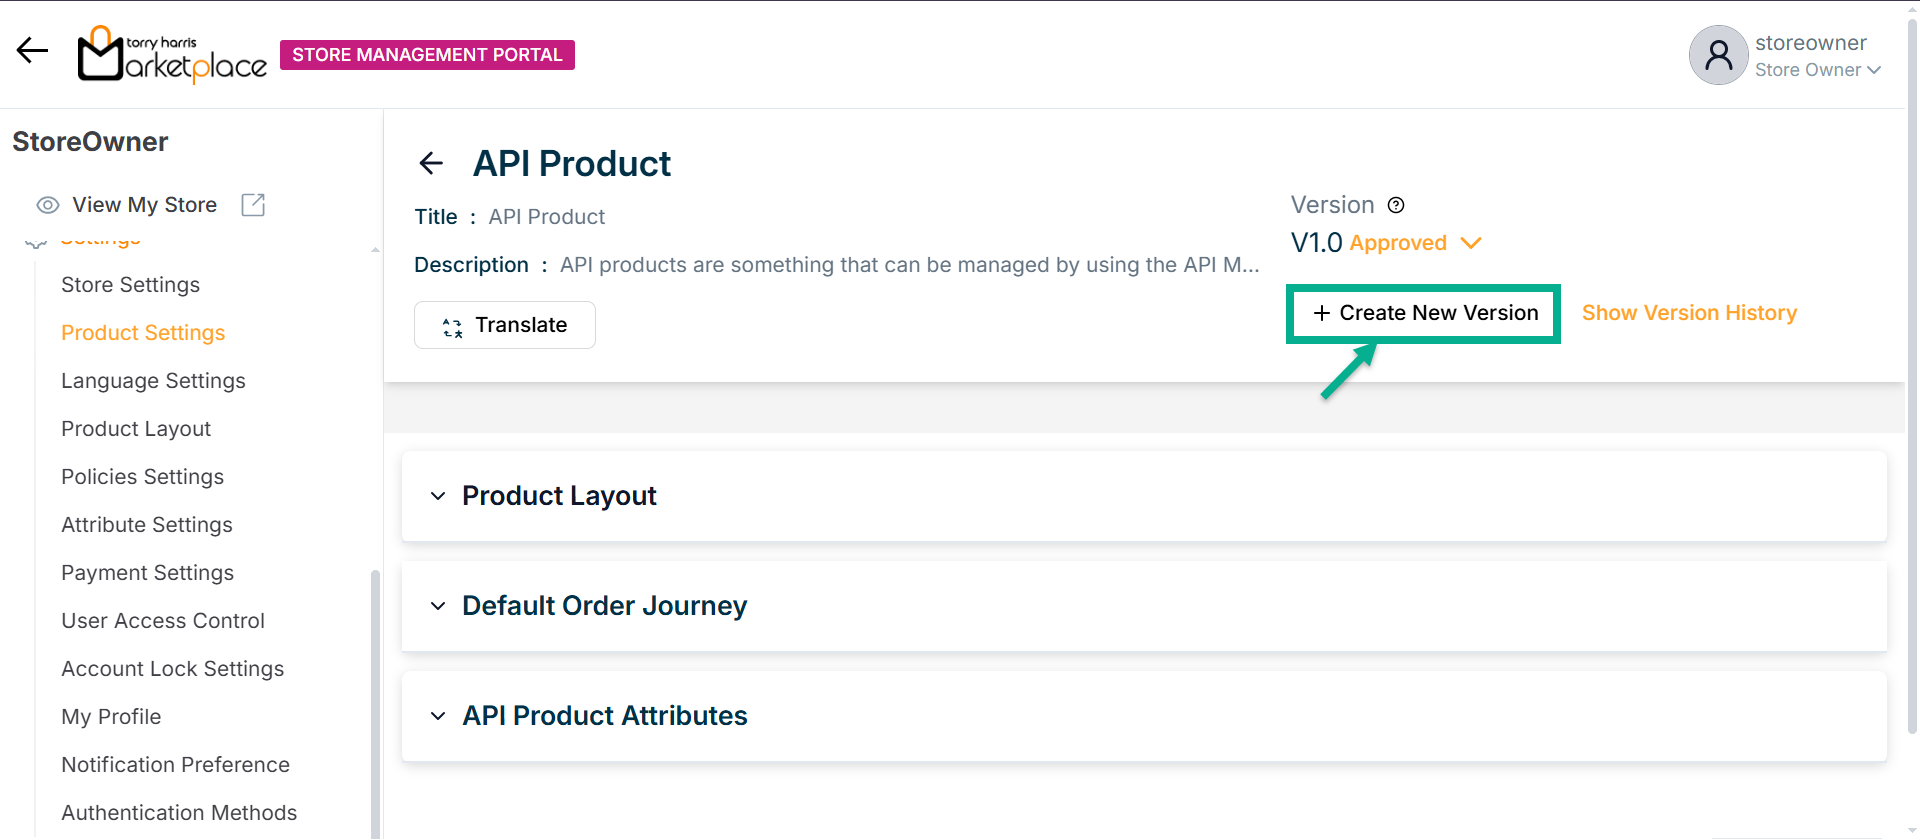
Creating a new version
- To Create New Version for a particular product type, click it.

- Click Create New Version.
The Create Product Type Version dialogue box appears as shown below.
The procedure for creating a new version differs based on which Version Type is selected.
The steps to create a new version are provided below if Version Type is selected as Create Version.
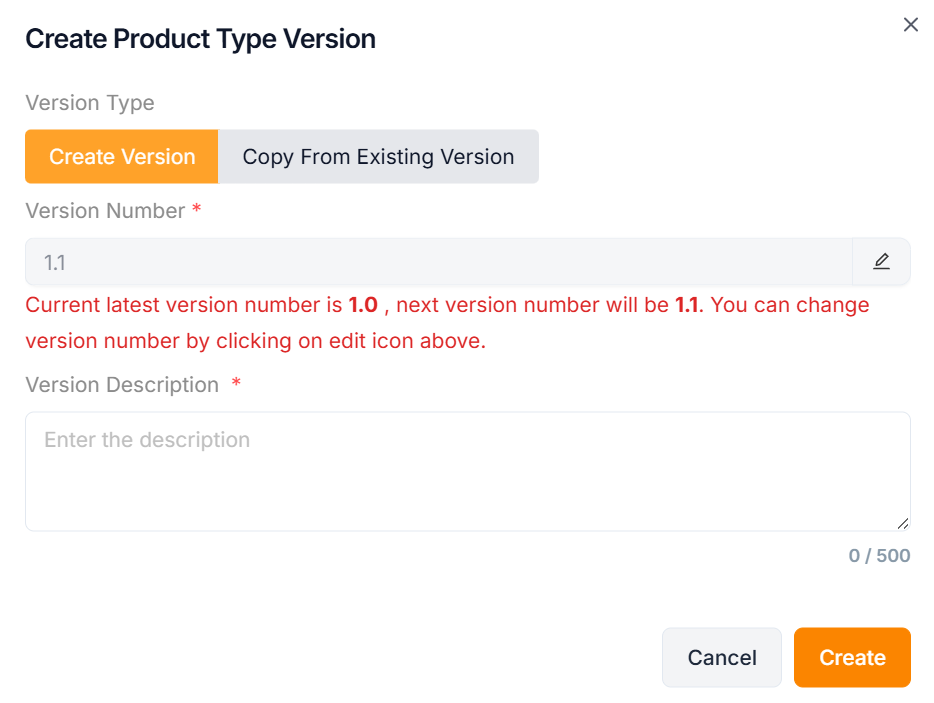
a. Select the Version Type as Create Version.
b. Click the Edit icon to edit the version number.
In the case when the most recent version number is 1, the amended version number should be 1.1 or higher.
The grid only shows the most recent version number that has been accepted; draft versions are not displayed.
c. Enter the Version Description.
d. Click Create.
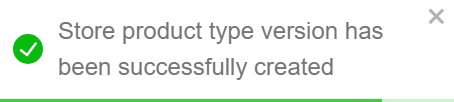
On creating, the confirmation message appears as shown below.
The steps to create a new version are provided below if Version Type is selected as Copy From Existing Version.
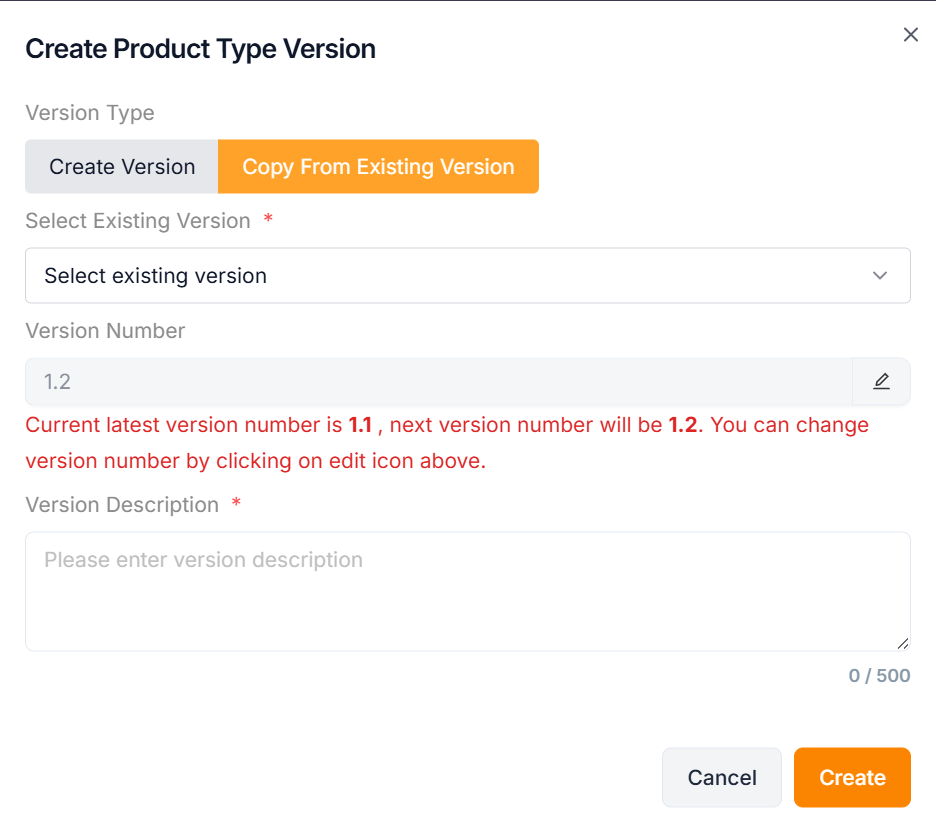
a. Select the Version Type as Copy From Existing Version.
b. Select Existing Version from the dropdown.
c. Click the Edit icon to edit the version number.
In the case when the most recent version number is 1, the amended version number should be 1.1 or higher.
The grid only shows the most recent version number that has been accepted; draft versions are not displayed.
d. Enter the Version Description.
e. Click Create.
On creating, the confirmation message appears as shown below.
Revising a Product Type
- Click on the Product Type that must be revised.

The respective product type is displayed along with its associated journey, as shown below.
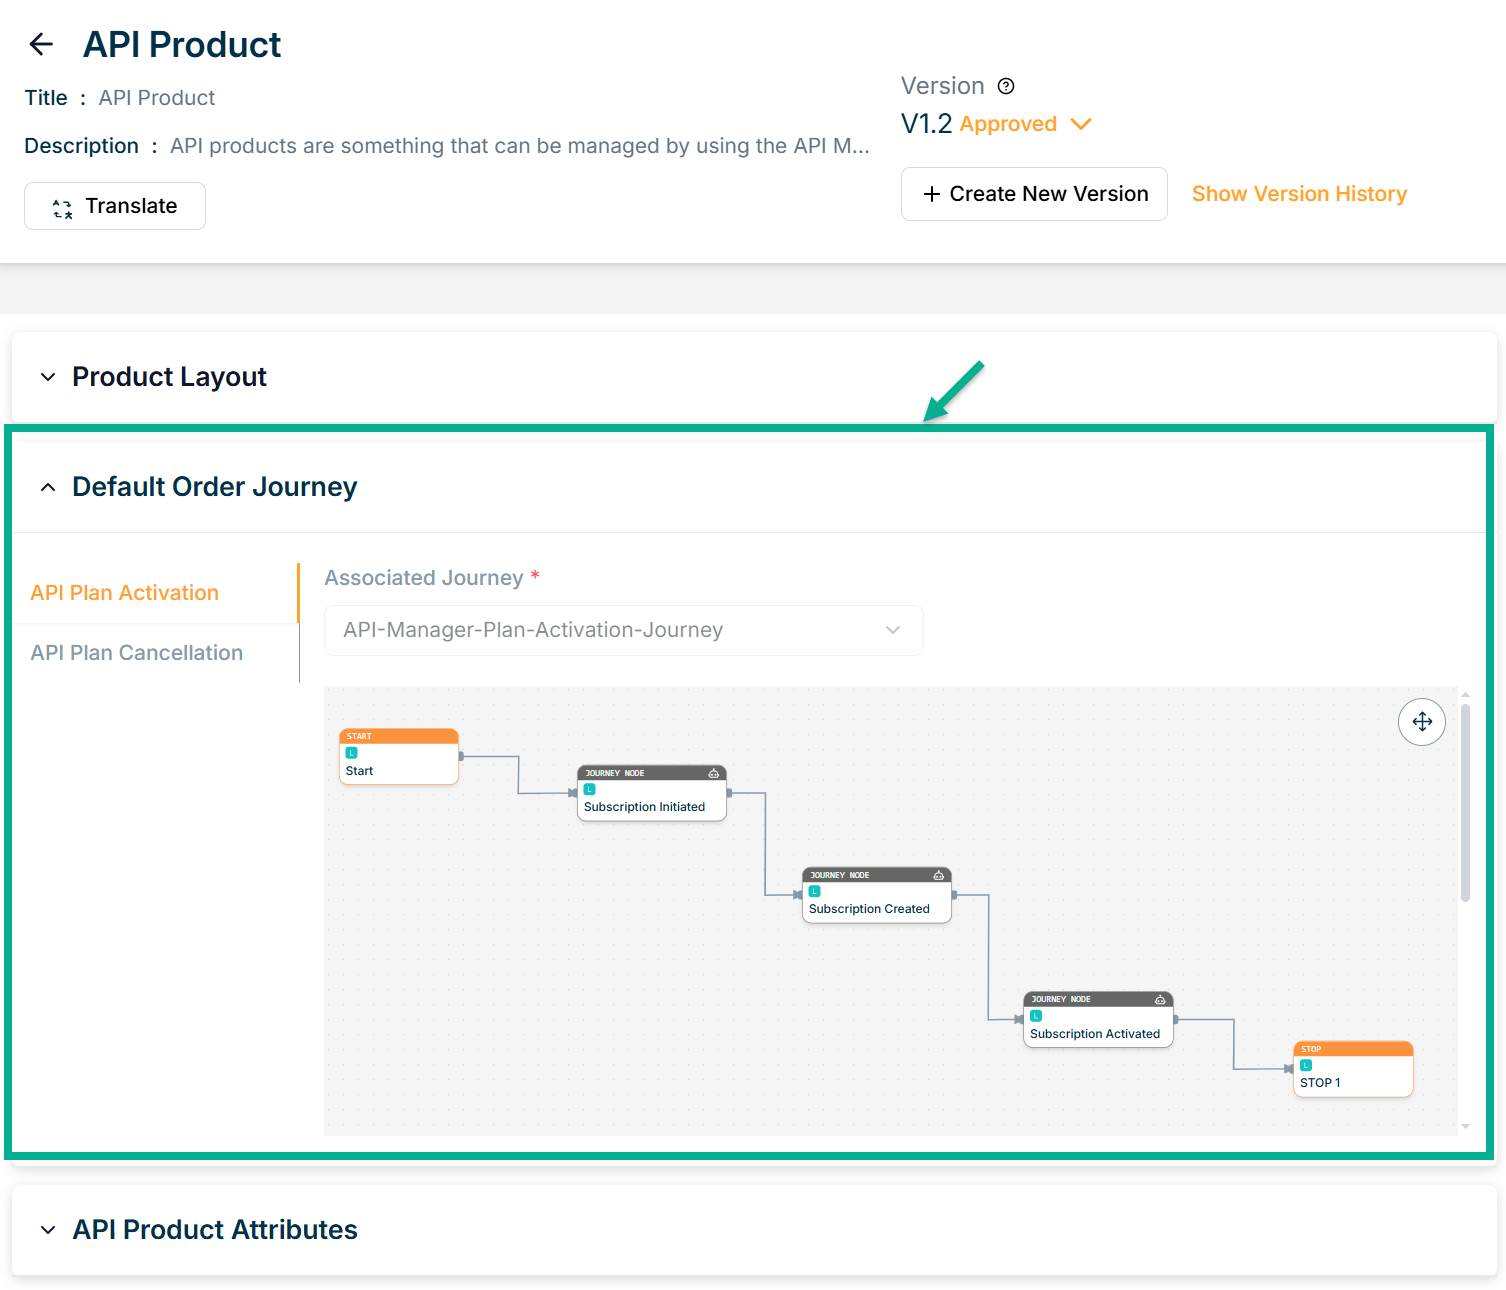
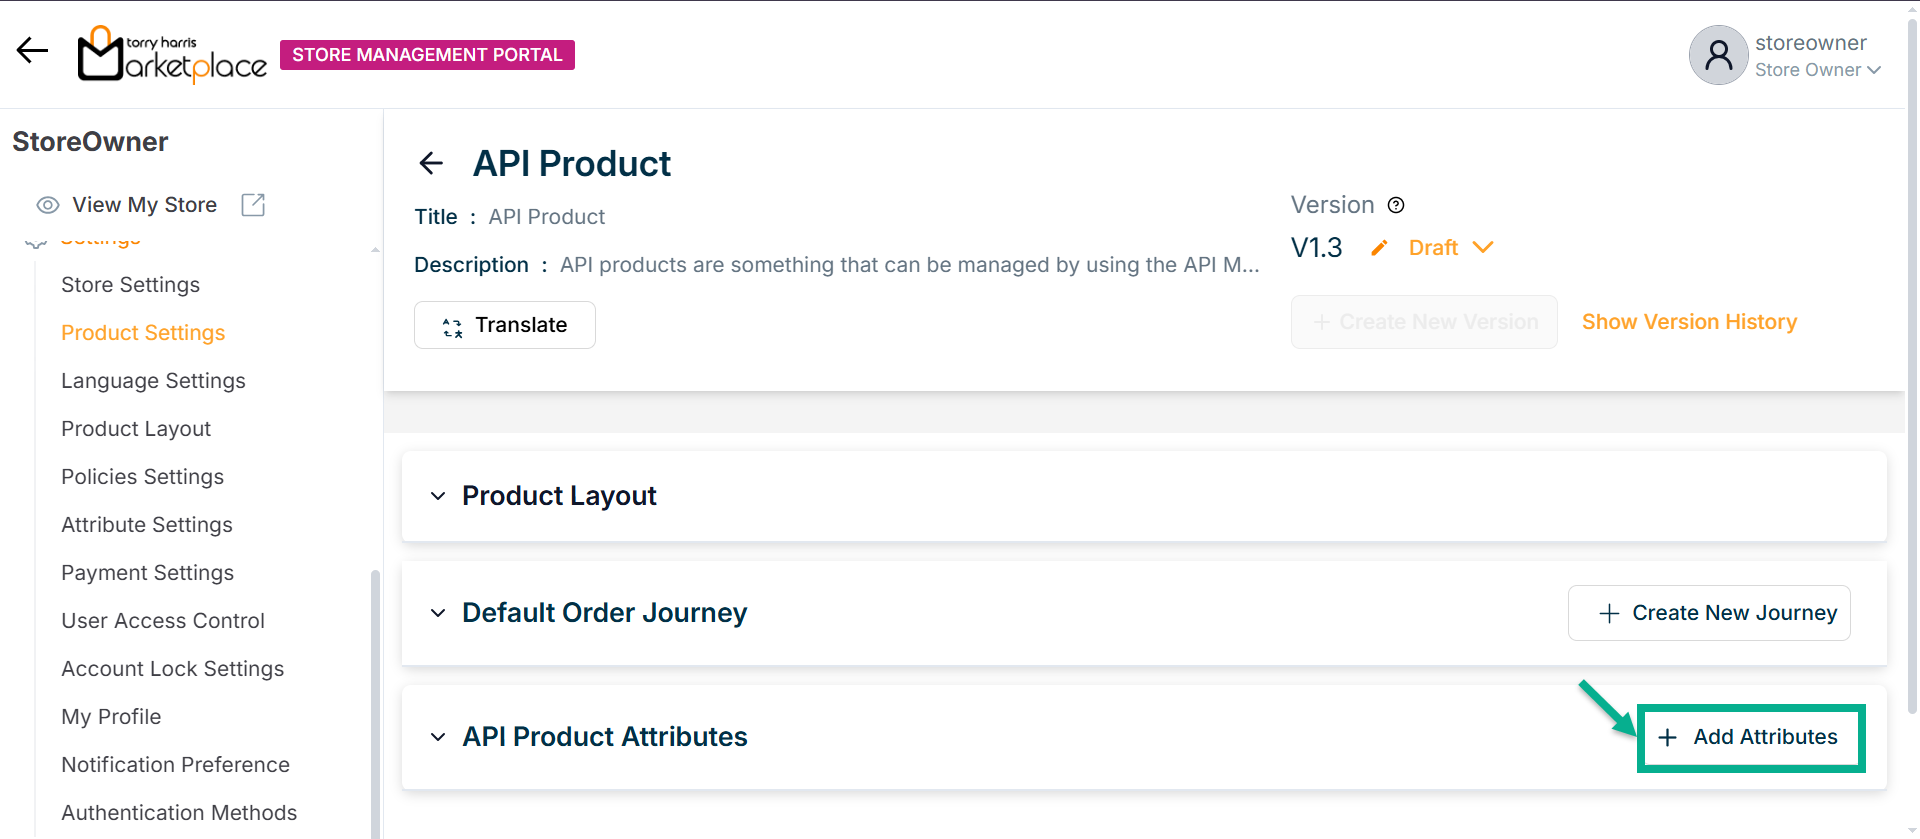
The Add More Attributes button appears only when the product type is in draft status.
- Click Add More Attributes to add add the attributes, if necessary.
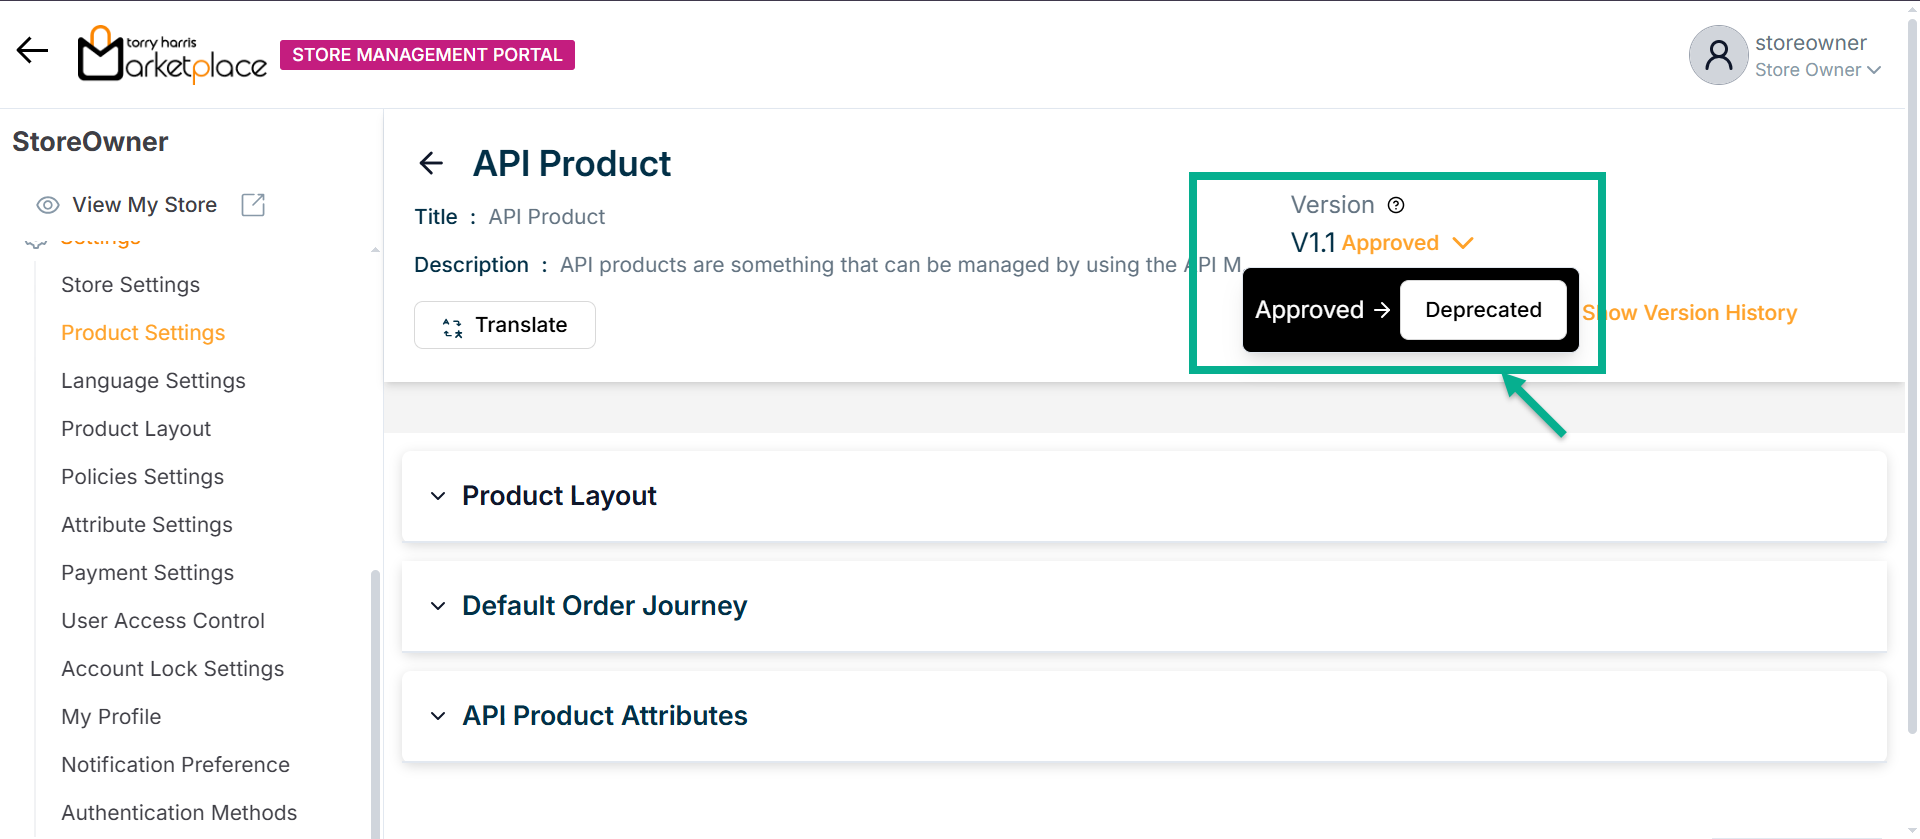
Approving a Product Type
A Product Type is given a version number once it has been made. A Product Type version numbering starts at 1 when it is first generated and approved and promotes as it is altered more frequently.
- To Approve a particular product type, click the respective product type.

- Click Approve from the drop-down.
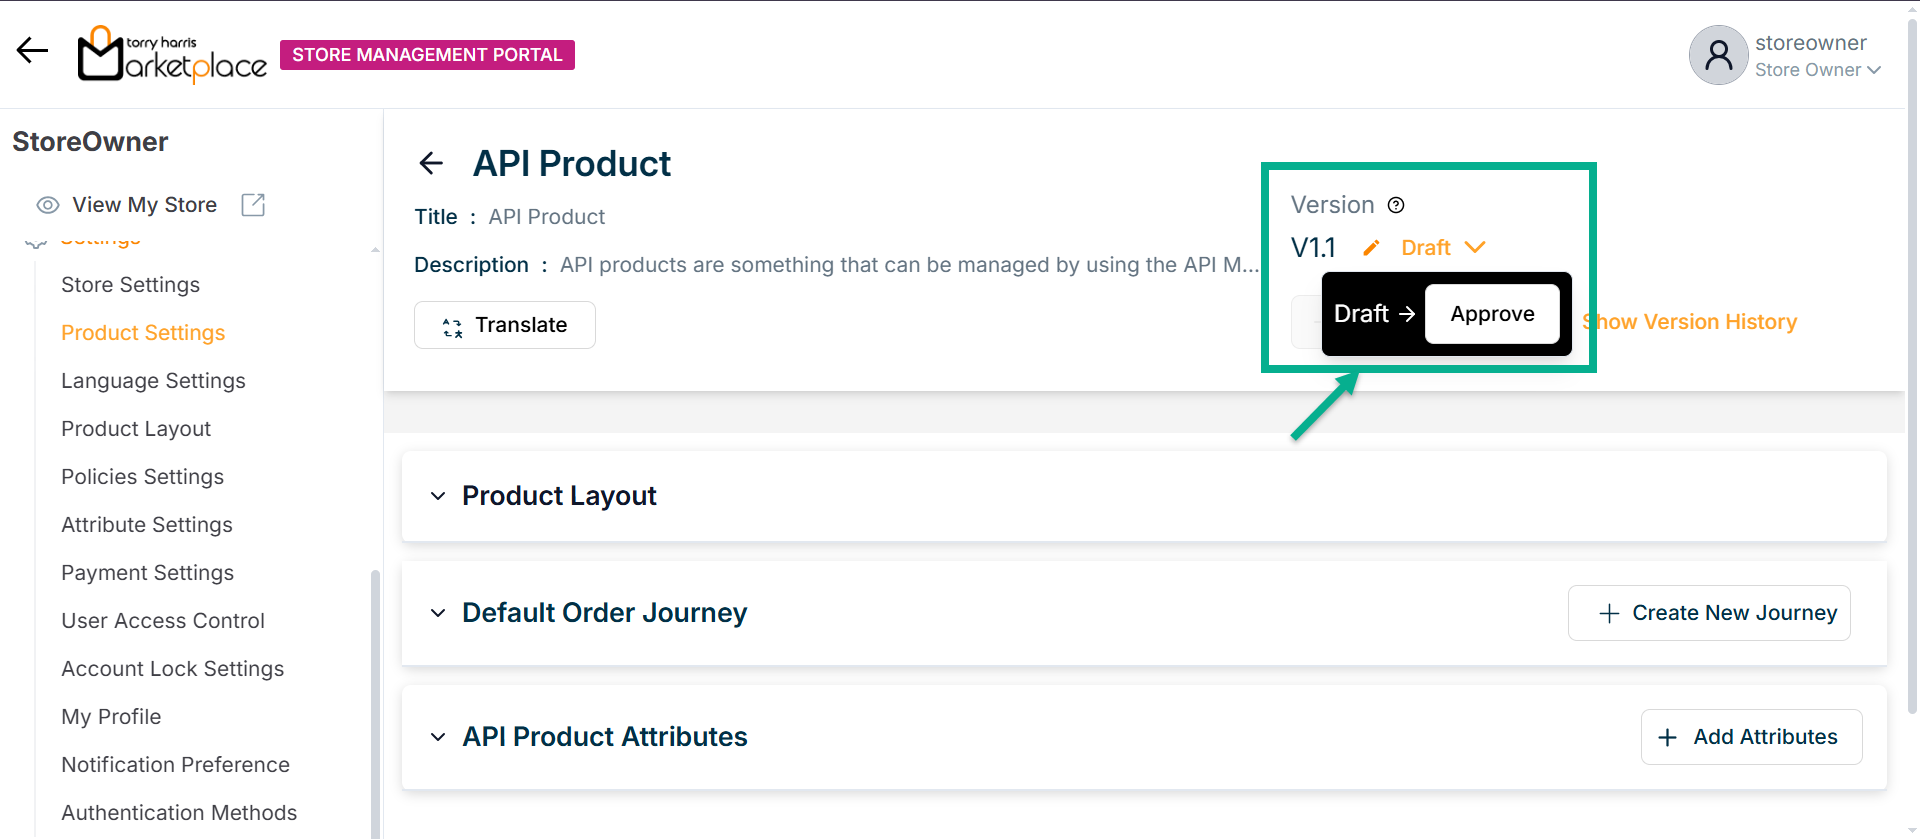
The dialogue box appears as shown below.
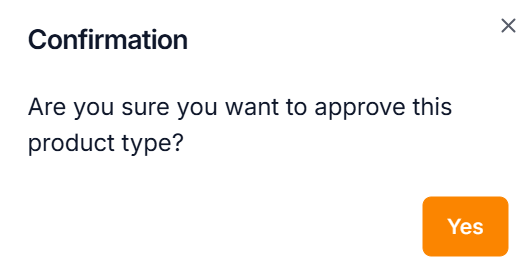
- Click Yes.
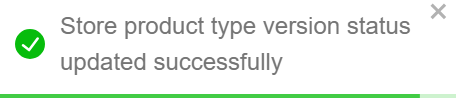
On approval, the confirmation message appears as shown below.
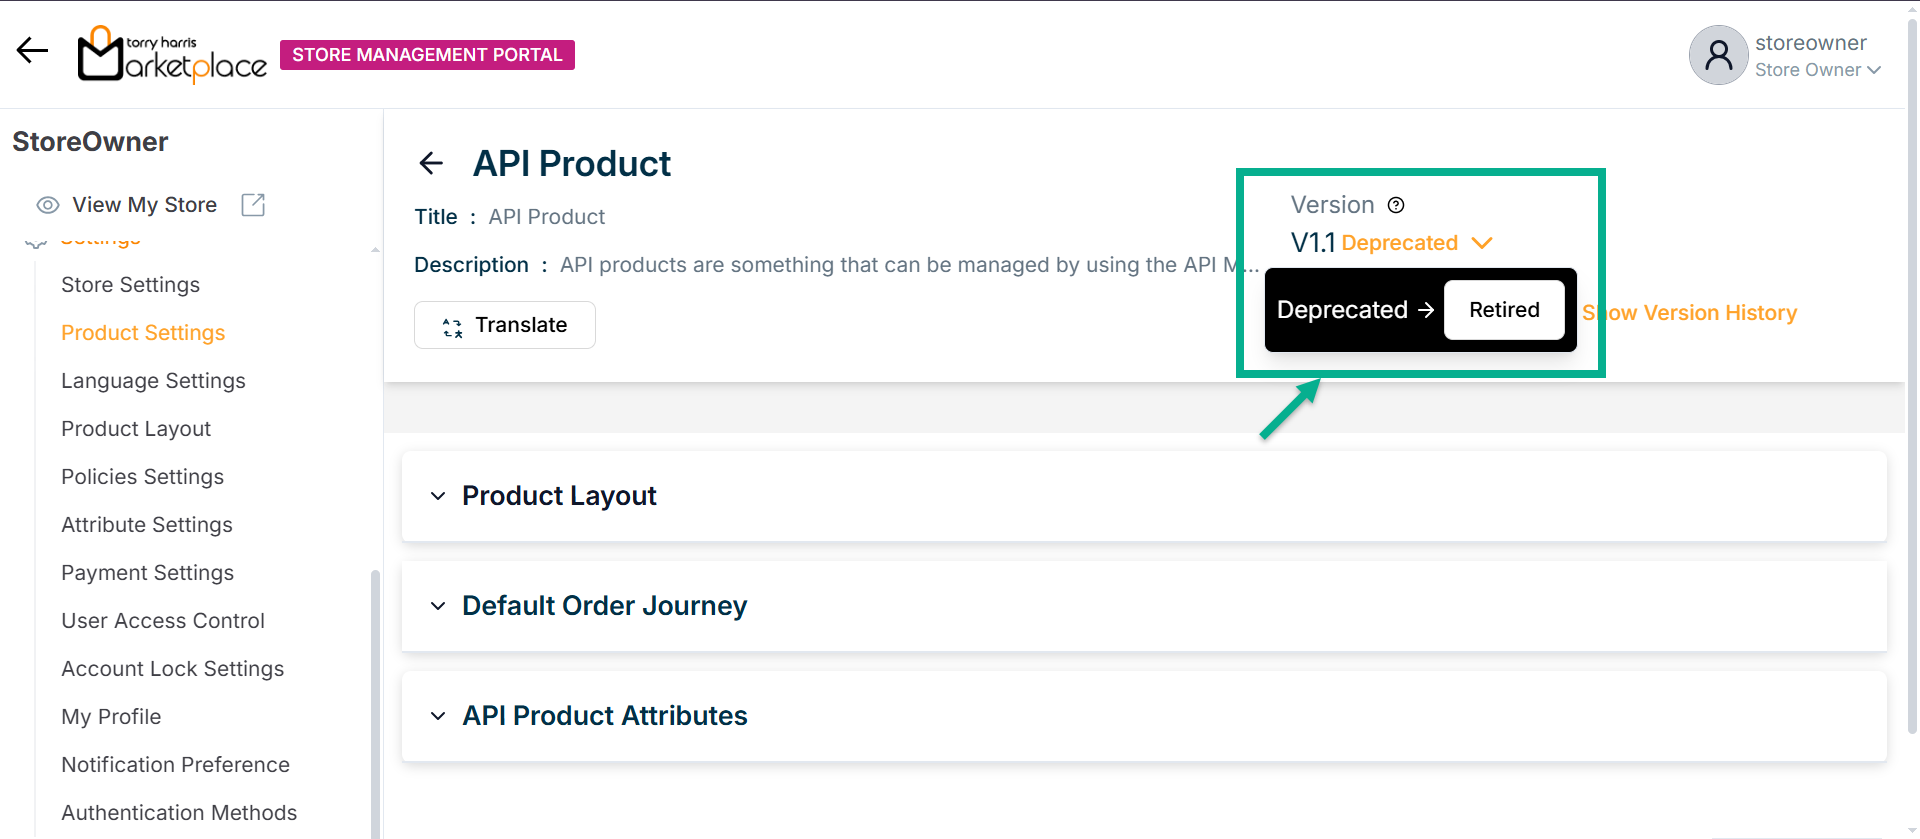
Deprecate a Product Type
- To Deprecate a particular product type, click it.

- Click Deprecated from the drop-down.
The dialogue box appears as shown below.
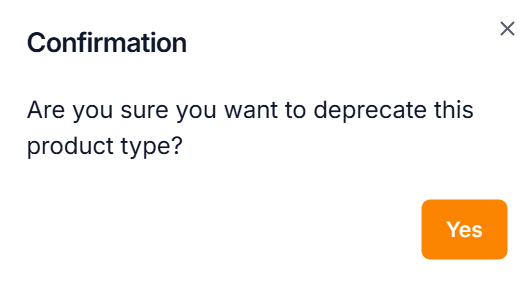
- Click Yes.
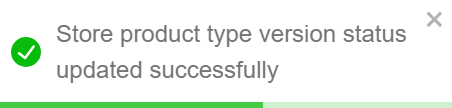
On deprecating, the confirmation message appears as shown below.

Retiring a Product Type
- To Retire a particular product type, click it.
- Click Retired from the drop-down.
The dialogue box appears as shown below.

- Click Yes.
On retiring, the confirmation message appears as shown below.
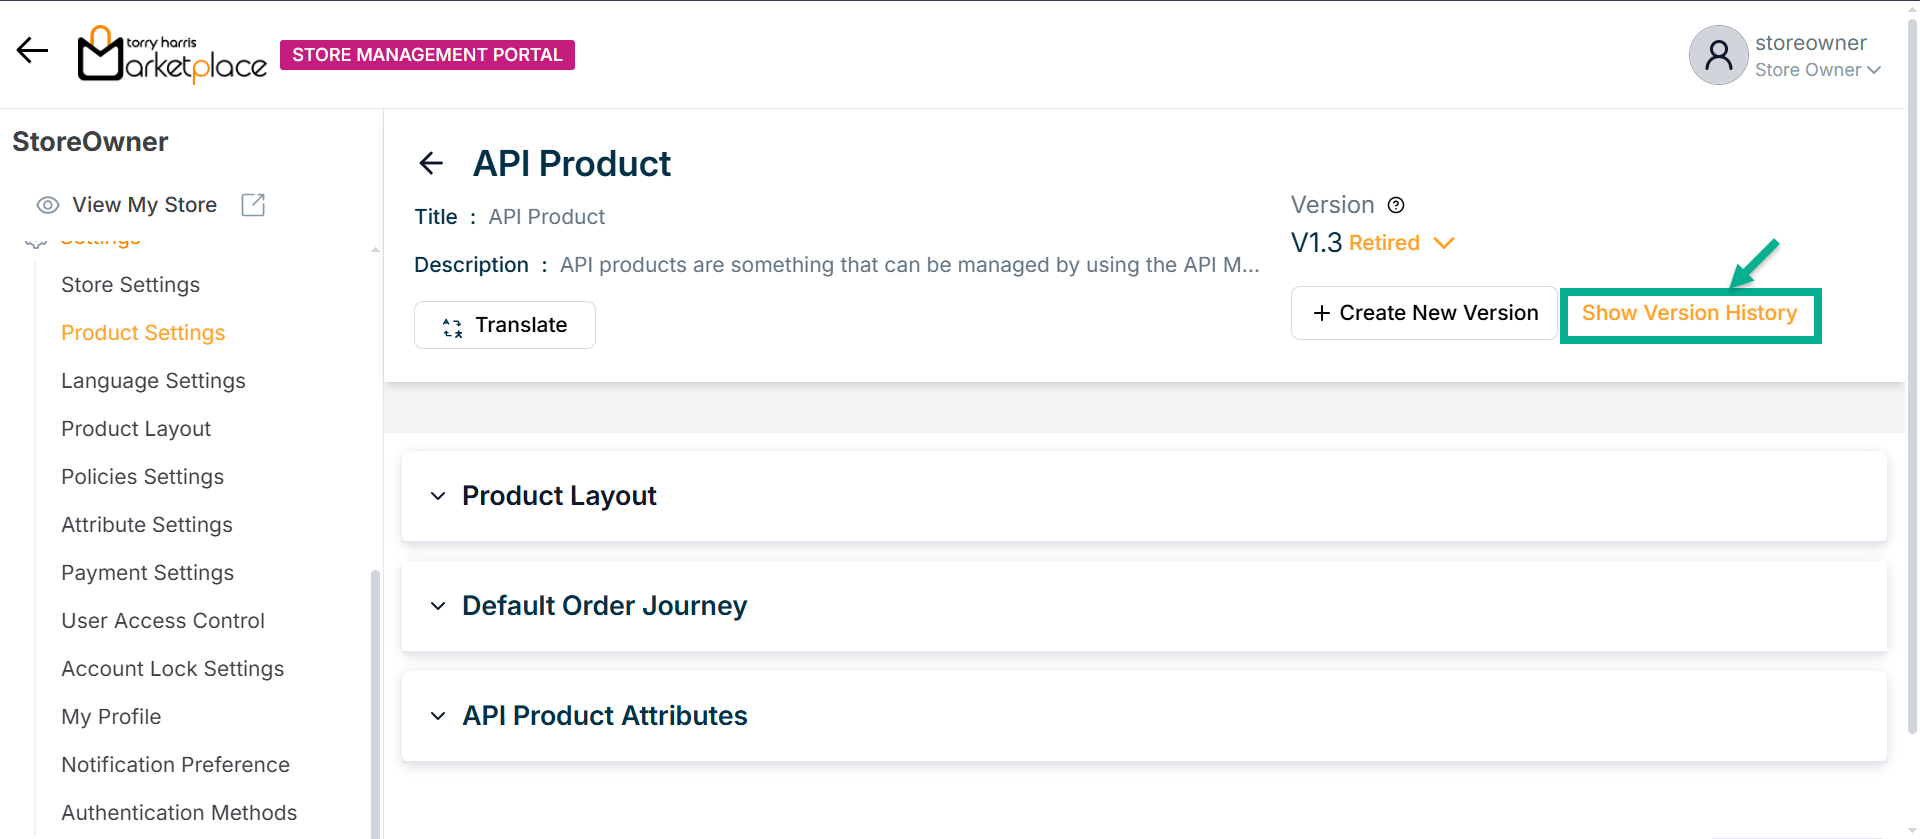
View the Version History
- To view the version history for a particular product type, click it.
- Click Show Version History.
The Version History dialogue box appears as shown below.
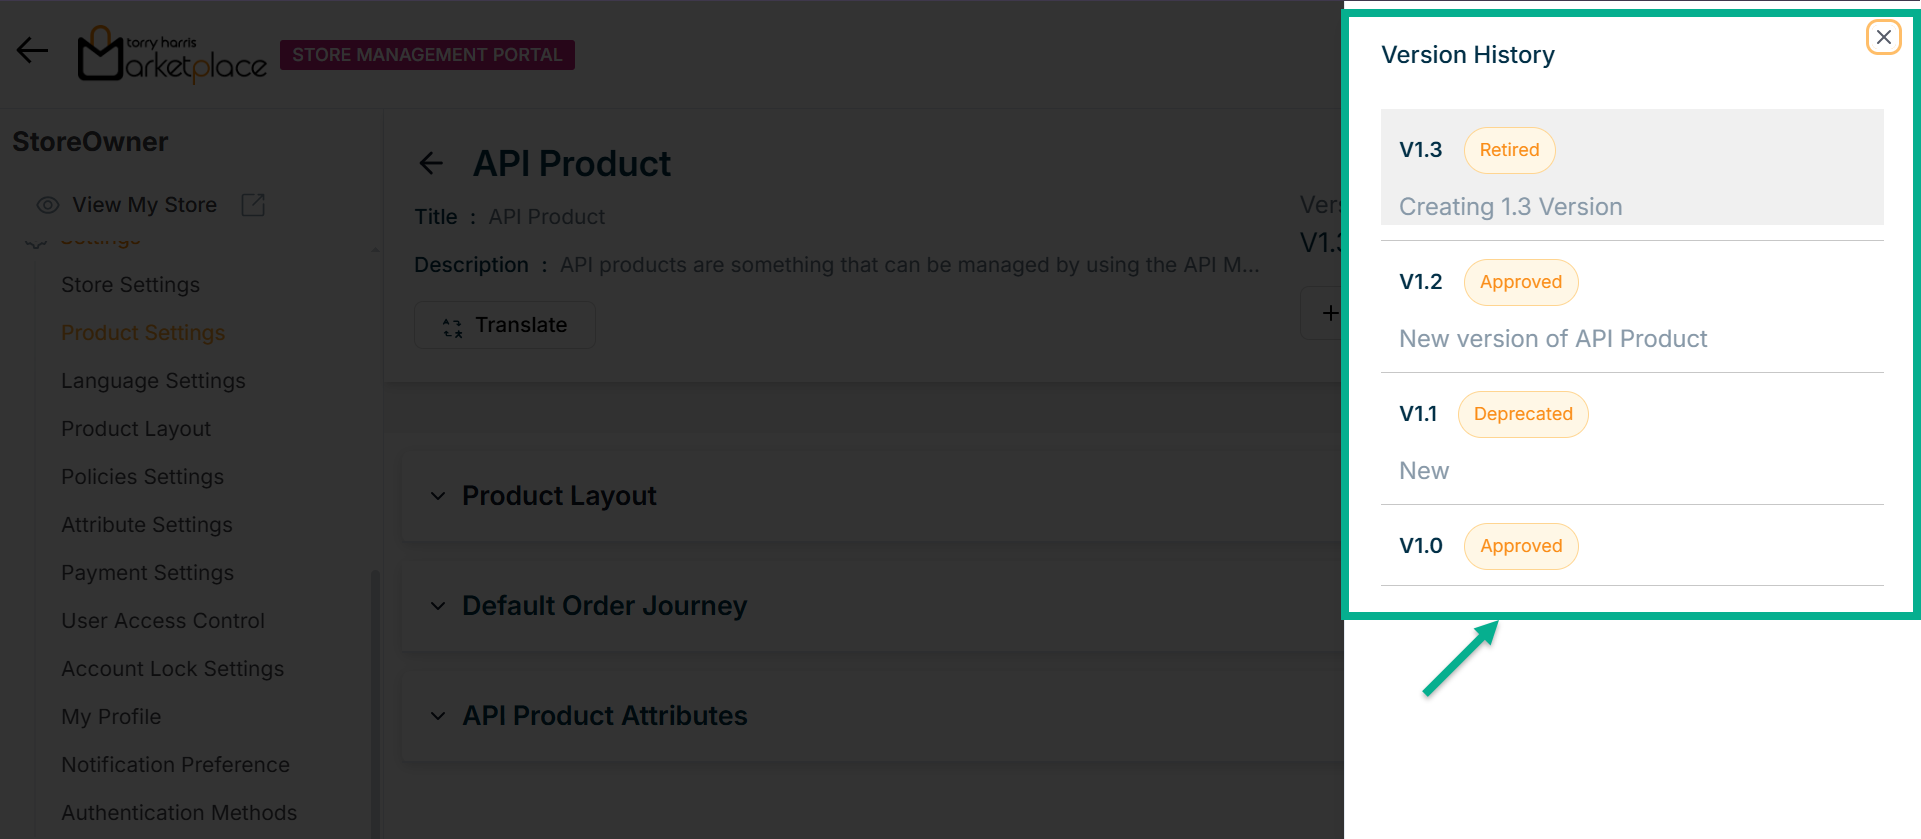
By clicking the relevant version in the version history, a user can move between versions of the product template.