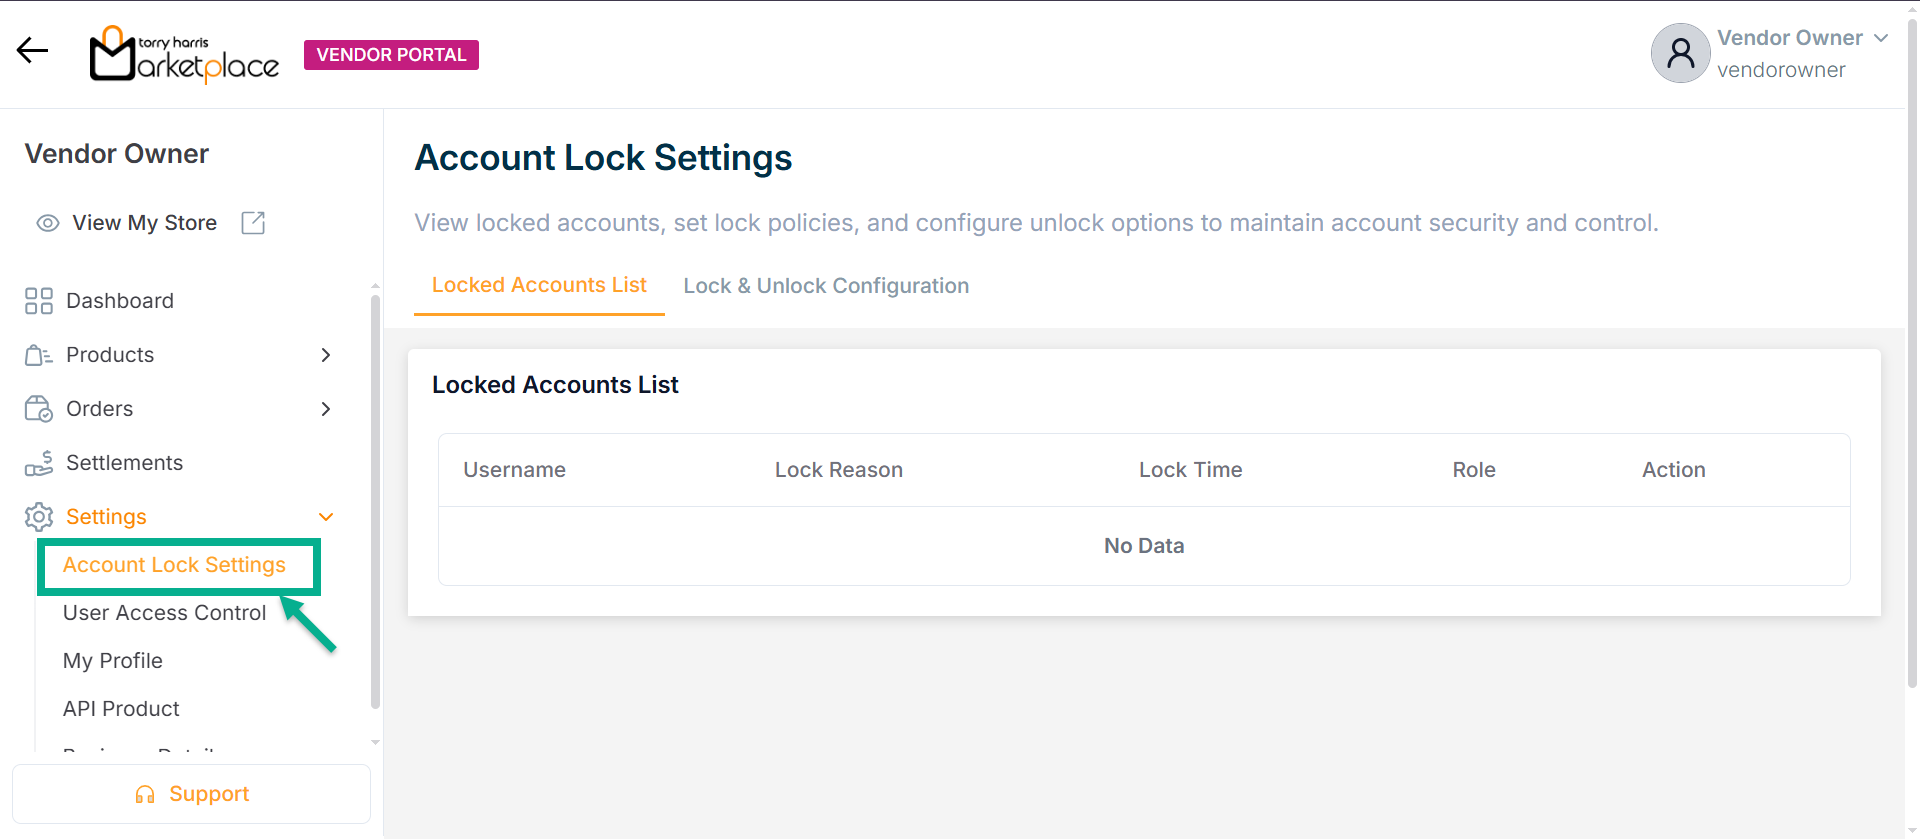
Account Lock Settings
The Account Lock Settings module allows Vendor to define and manage how user accounts are locked due to security violations (such as repeated failed login attempts) and how they are unlocked. This enhances security and protects against unauthorized access.
Account Lock Configuration
Prevent unauthorized access by locking user accounts after a specific number of failed login attempts.
- Go to Lock & Unlock Configuration tab.
The Lock & Unlock Configuration screen appears as shown below
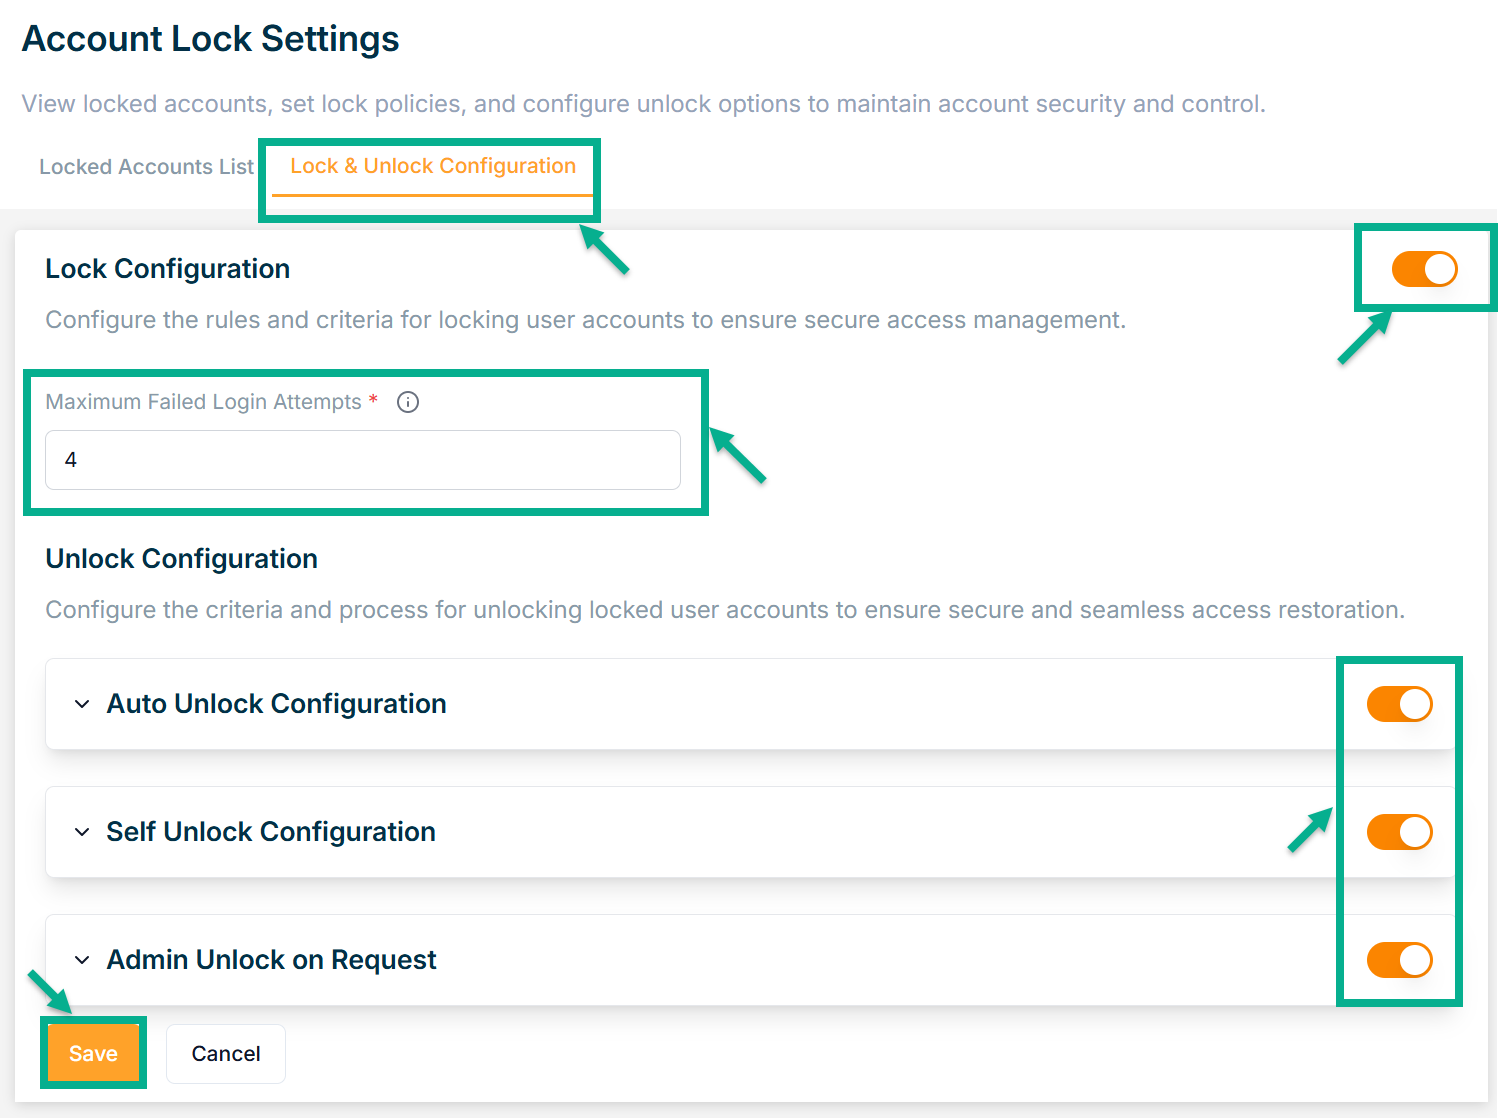
- Enter Maximum Failed Login Attempts between 4 and 10.
If the toggle button is disabled (turned off) in the Account Lock Settings, it means that the respective configuration is inactive or not applied.
- Click Save.
On saving, the confirmation message appears as shown below.

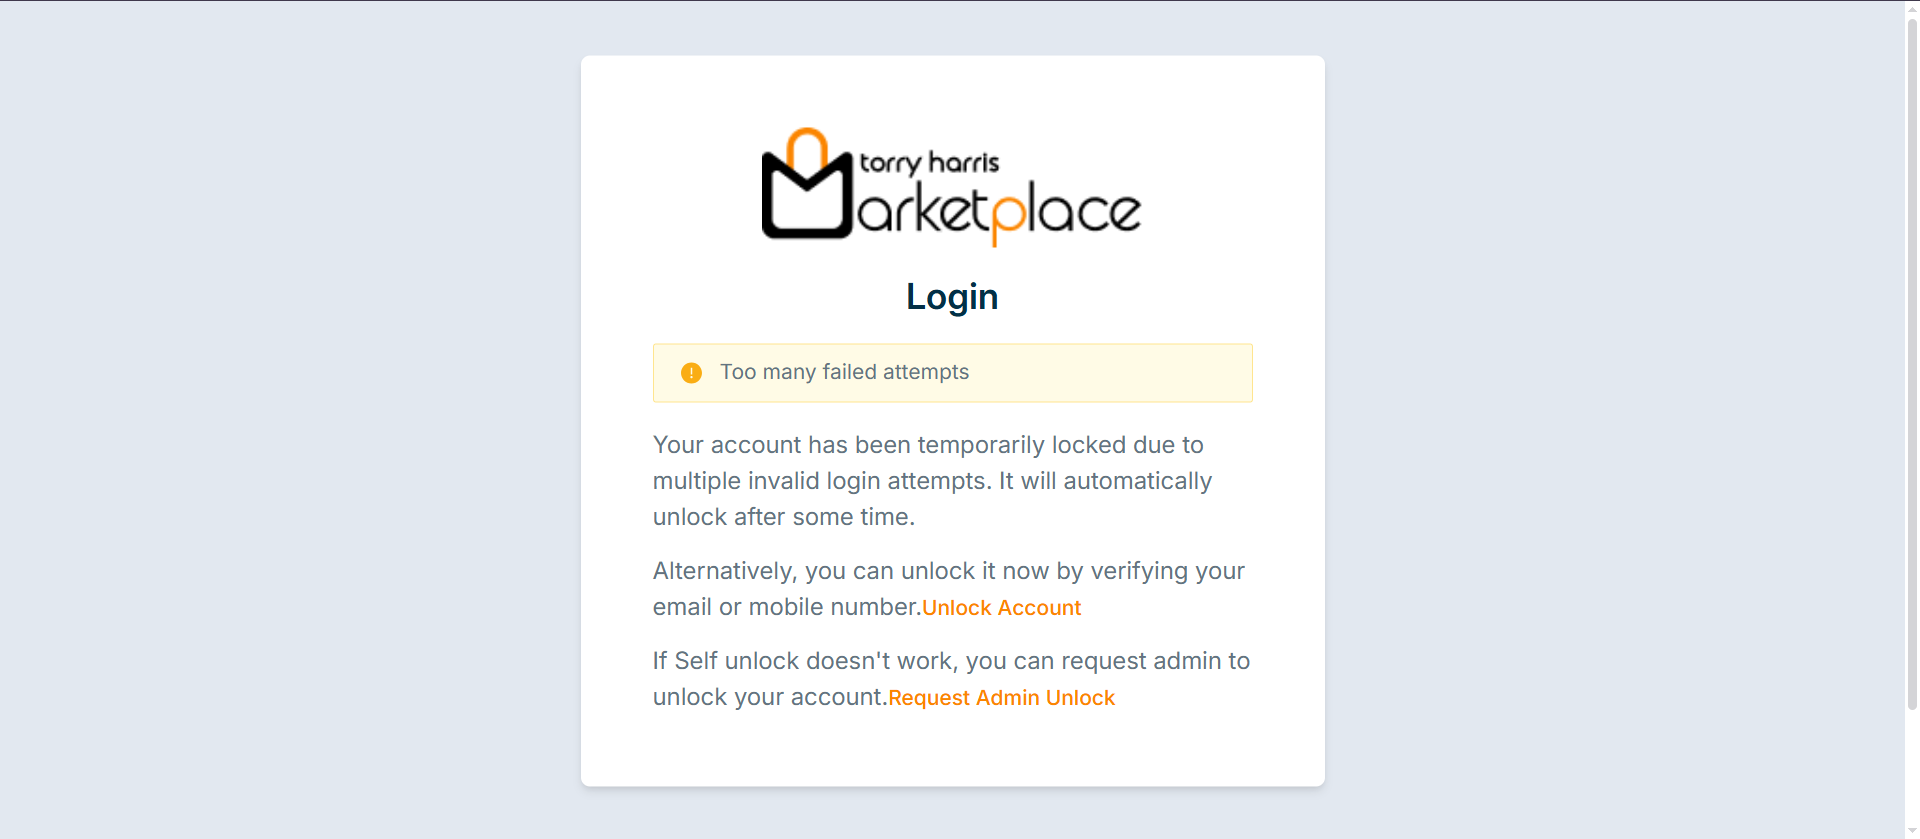
On the login page, if incorrect credentials are entered repeatedly, the Too many failed attempts screen will appear as shown below.
Account Unlock Configuration
Vendor can configure three ways to unlock locked user accounts:
- Auto Unlock Configuration.
- Self Unlock Configuration.
- Admin Unlock on Request.
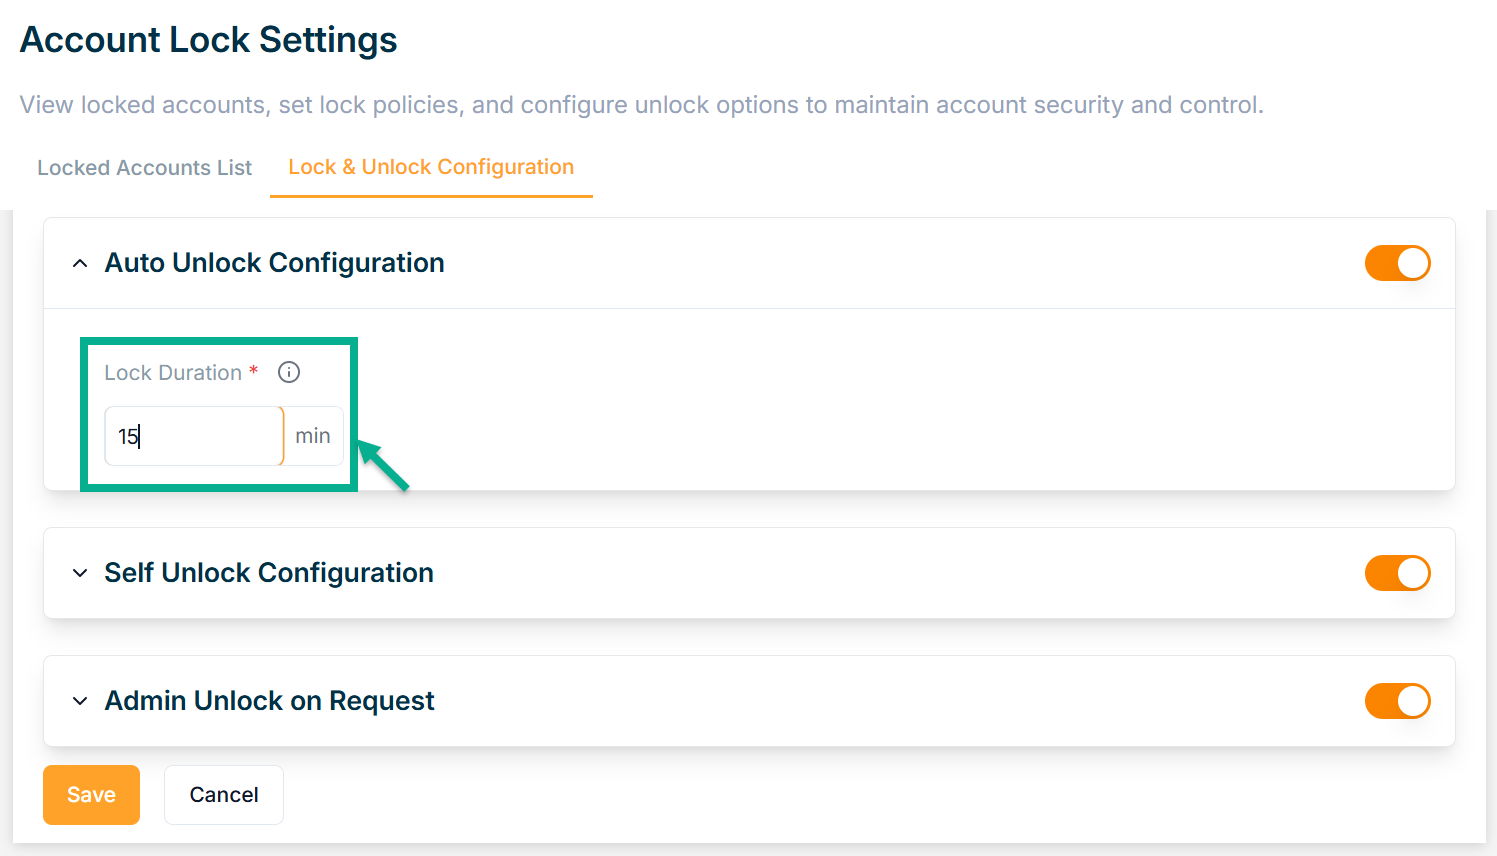
Auto Unlock Configuration
Automatically unlocks the account after a predefined time.
- Click on Auto Unlock Configuration dropdown.
-
Enter a Lock Duration between 15 and 120 minutes.
-
Click Save.
On saving, the confirmation message appears as shown below.
Self Unlock Configuration
Allows users to unlock their accounts without admin help.
Two methods:
- Email with unlock link
- OTP - based validation (email or mobile number)
If vendor selects the Self Unlock Configuration as Email with unlock link:
- Click on Self Unlock Configuration dropdown.
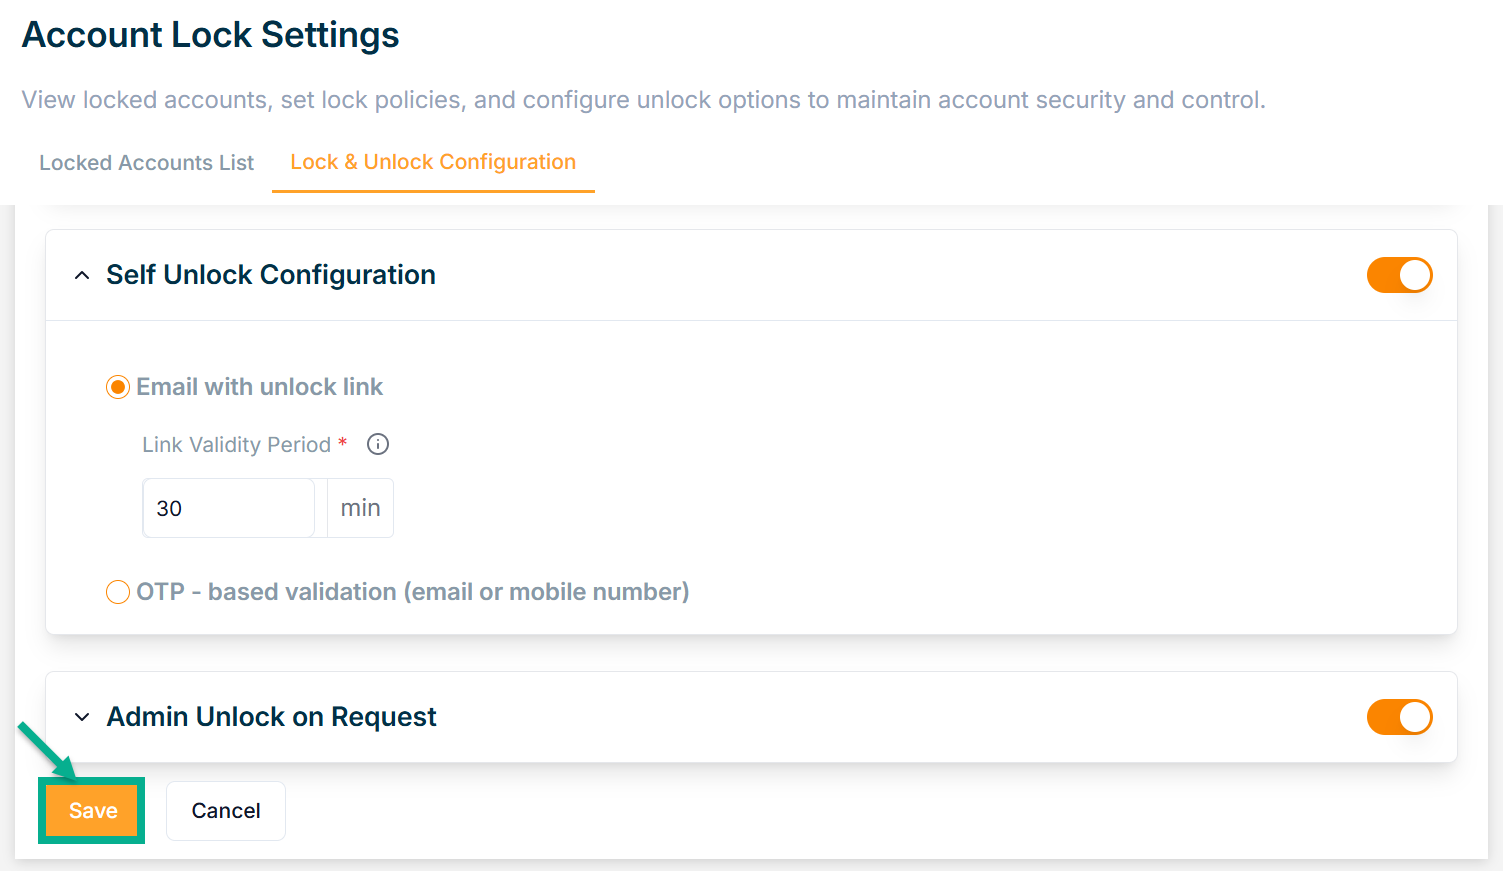
-
Enter Link Validity Period between 30 and 120 minutes.
-
Click Save.
On saving, the confirmation message appears as shown below.
If vendor selects the Self Unlock Configuration as OTP - based validation:
- Click OTP - based validation (email or mobile number) radio button.
There are three types of OTP Delivery Methods available:
- SMS
- Both
Example Use Case: Both
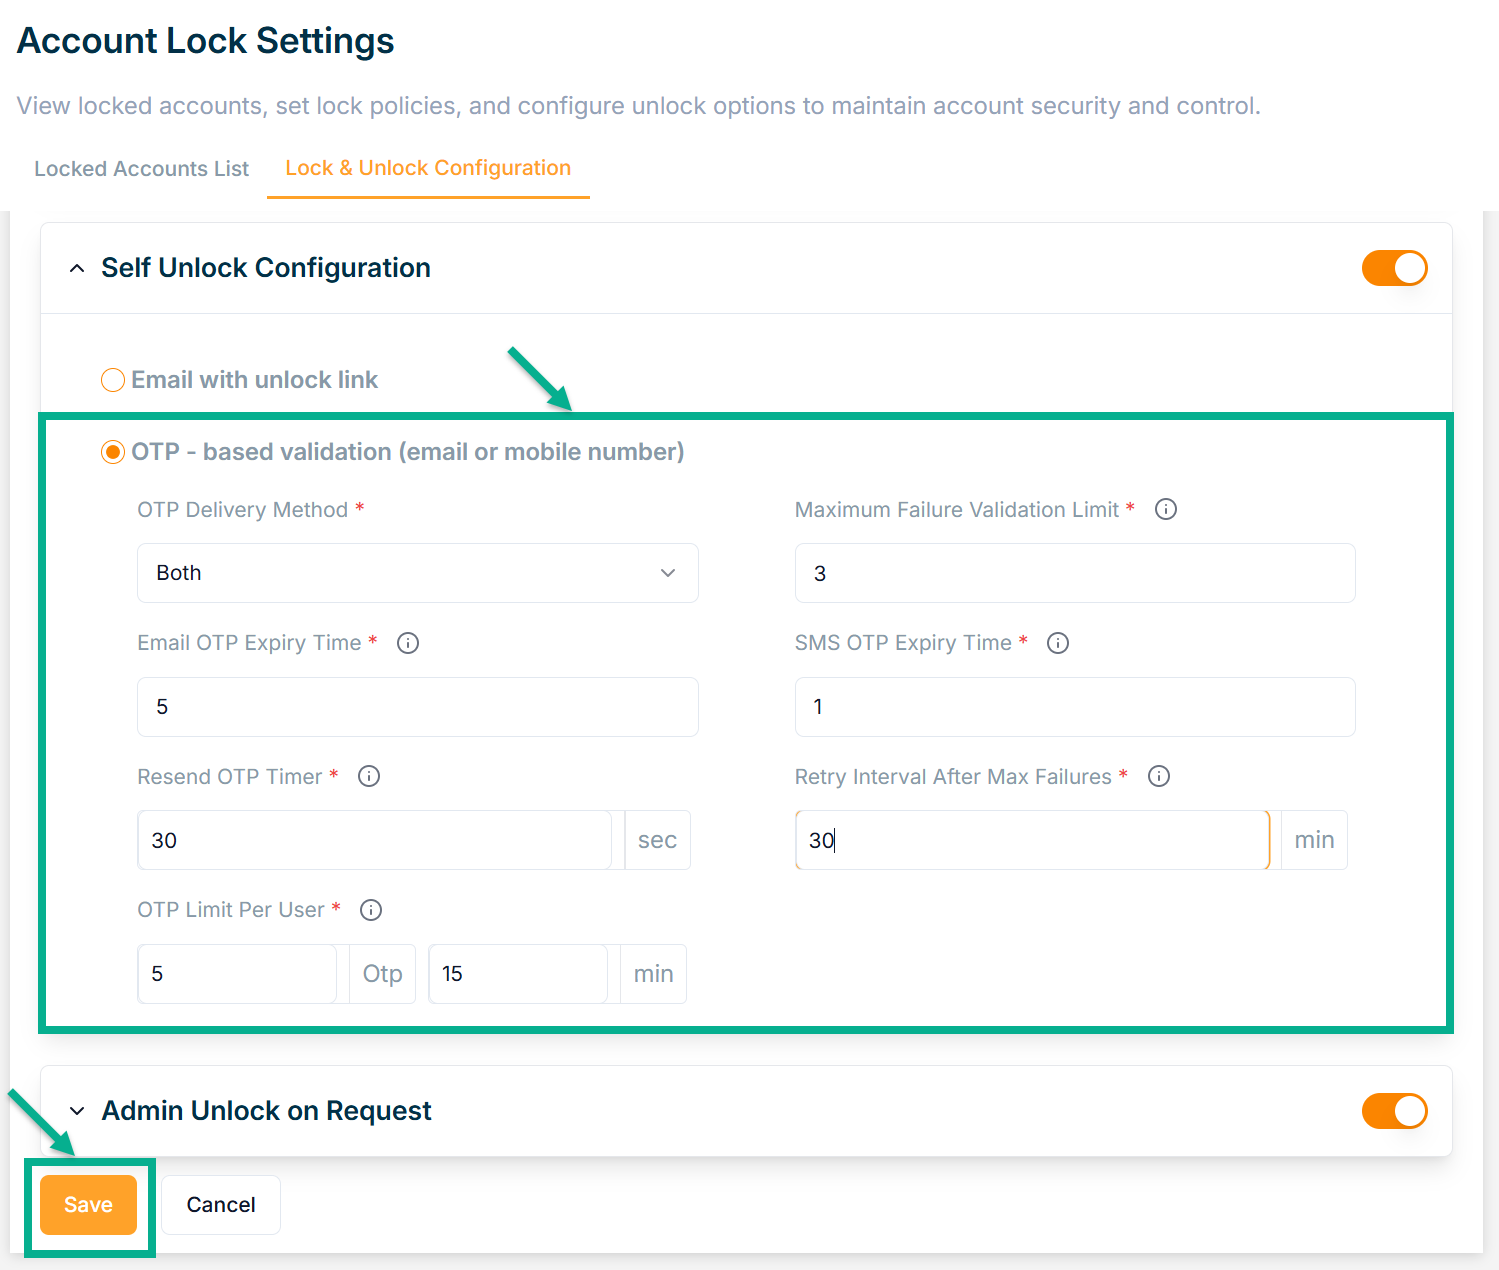
-
Select OTP Delivery Method from the dropdown.
-
Enter Maximum Failure Validation Limit between 3 and 8.
-
Enter Email OTP Expiry Time between 5 and 30 minutes.
-
Enter SMS OTP Expiry Time between 1 and 15 minutes.
-
Enter Resend OTP Timer between 30 and 120 seconds.
-
Enter Retry Interval After Max Failures between 10 and 30 minutes.
-
Enter Maximum OTP Limit Per User between 5 and 10 and between 15 and 30 minutes.
-
Enter Save.
On saving, the confirmation message appears as shown below.
On the login page, if incorrect credentials are entered repeatedly, the Too many failed attempts screen will appear as shown below.
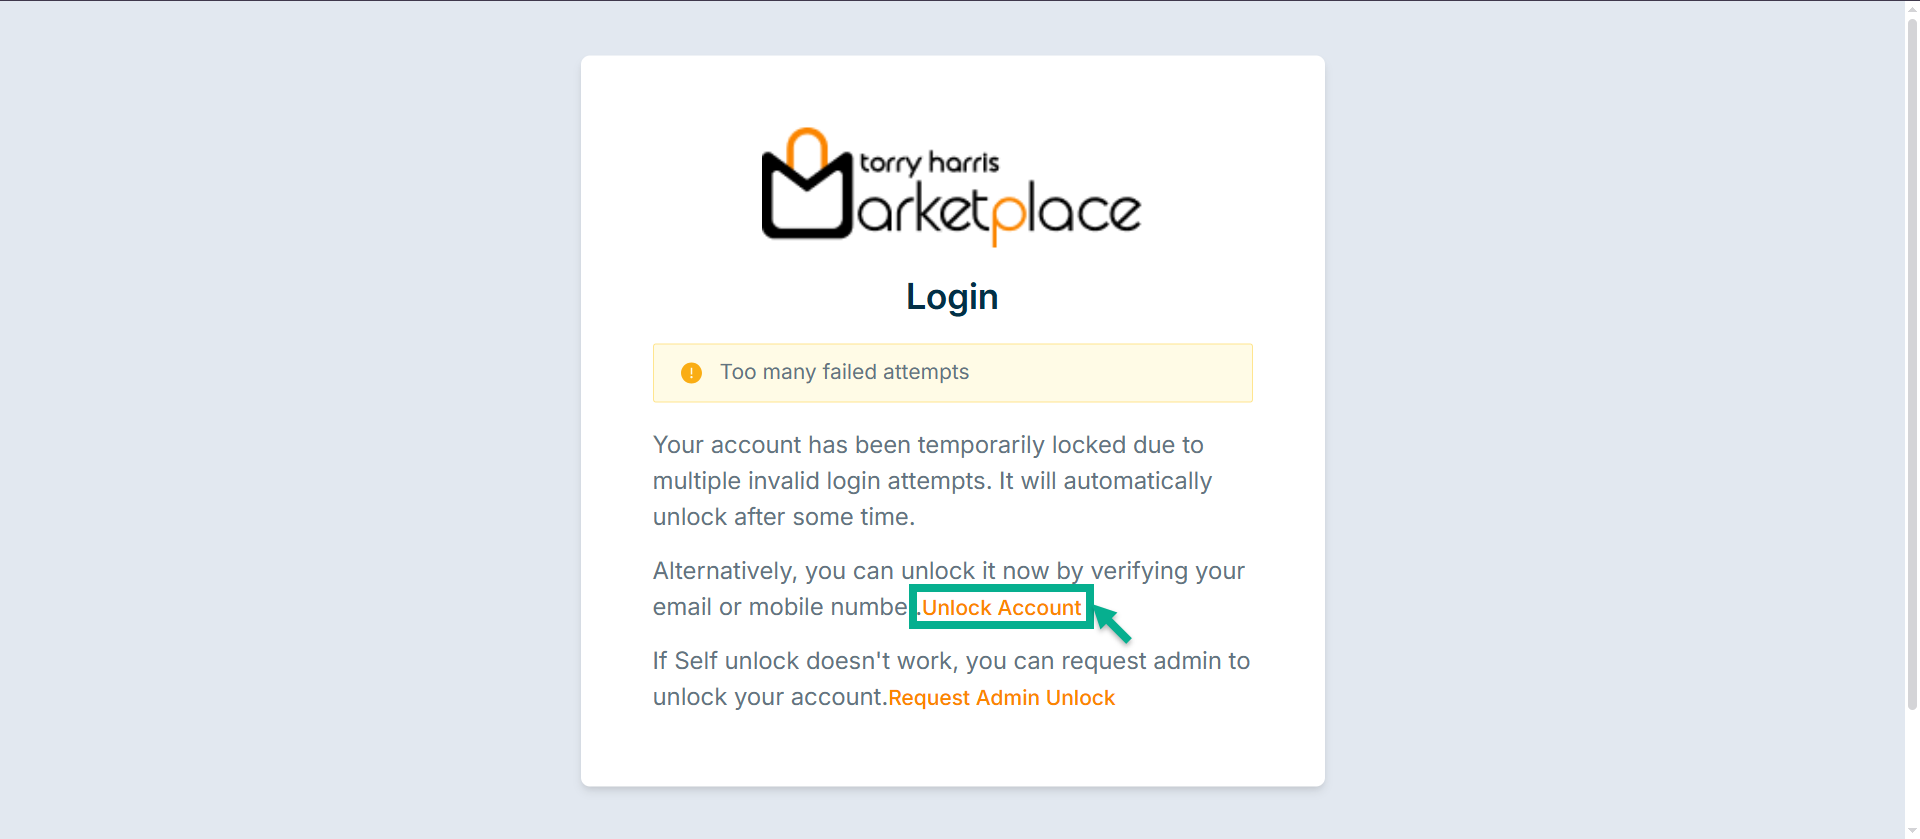
- Click Unlock Account.
The Unlock screen displays as shown below
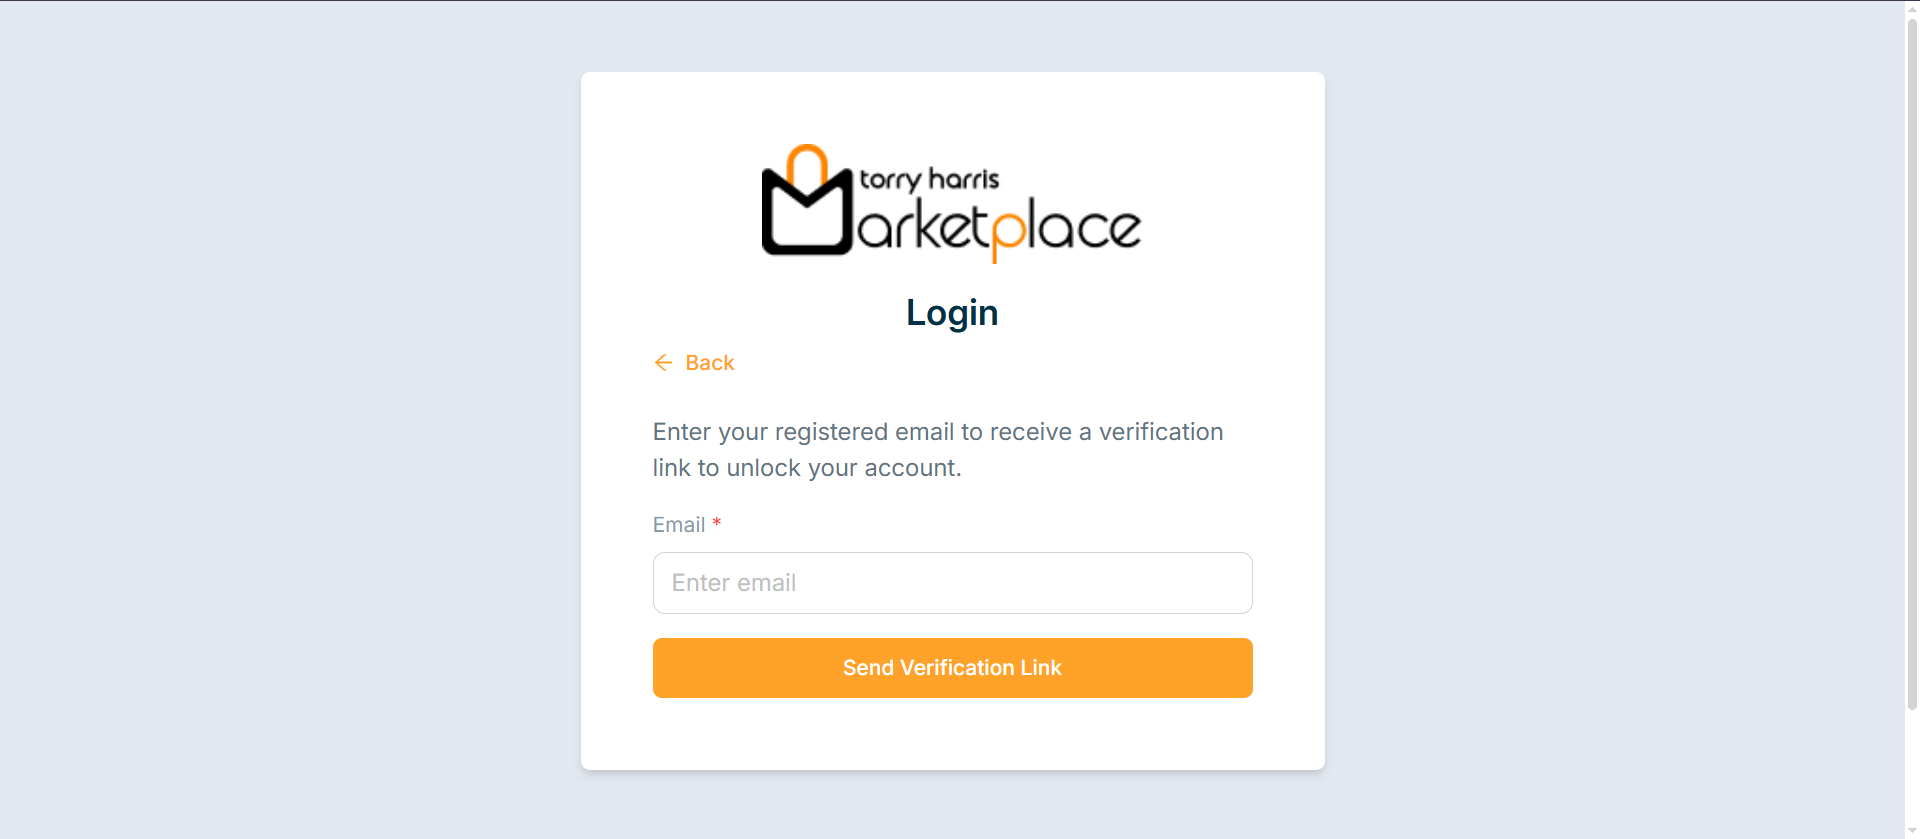
-
Enter Email.
-
Click Send Verification Link.
An OTP will be sent to the registered email id.
After clicking Get OTP, a timer will start.
Once the timer completes, the Resend OTP button will appear, allowing the user to request the OTP again.
- Enter OTP.
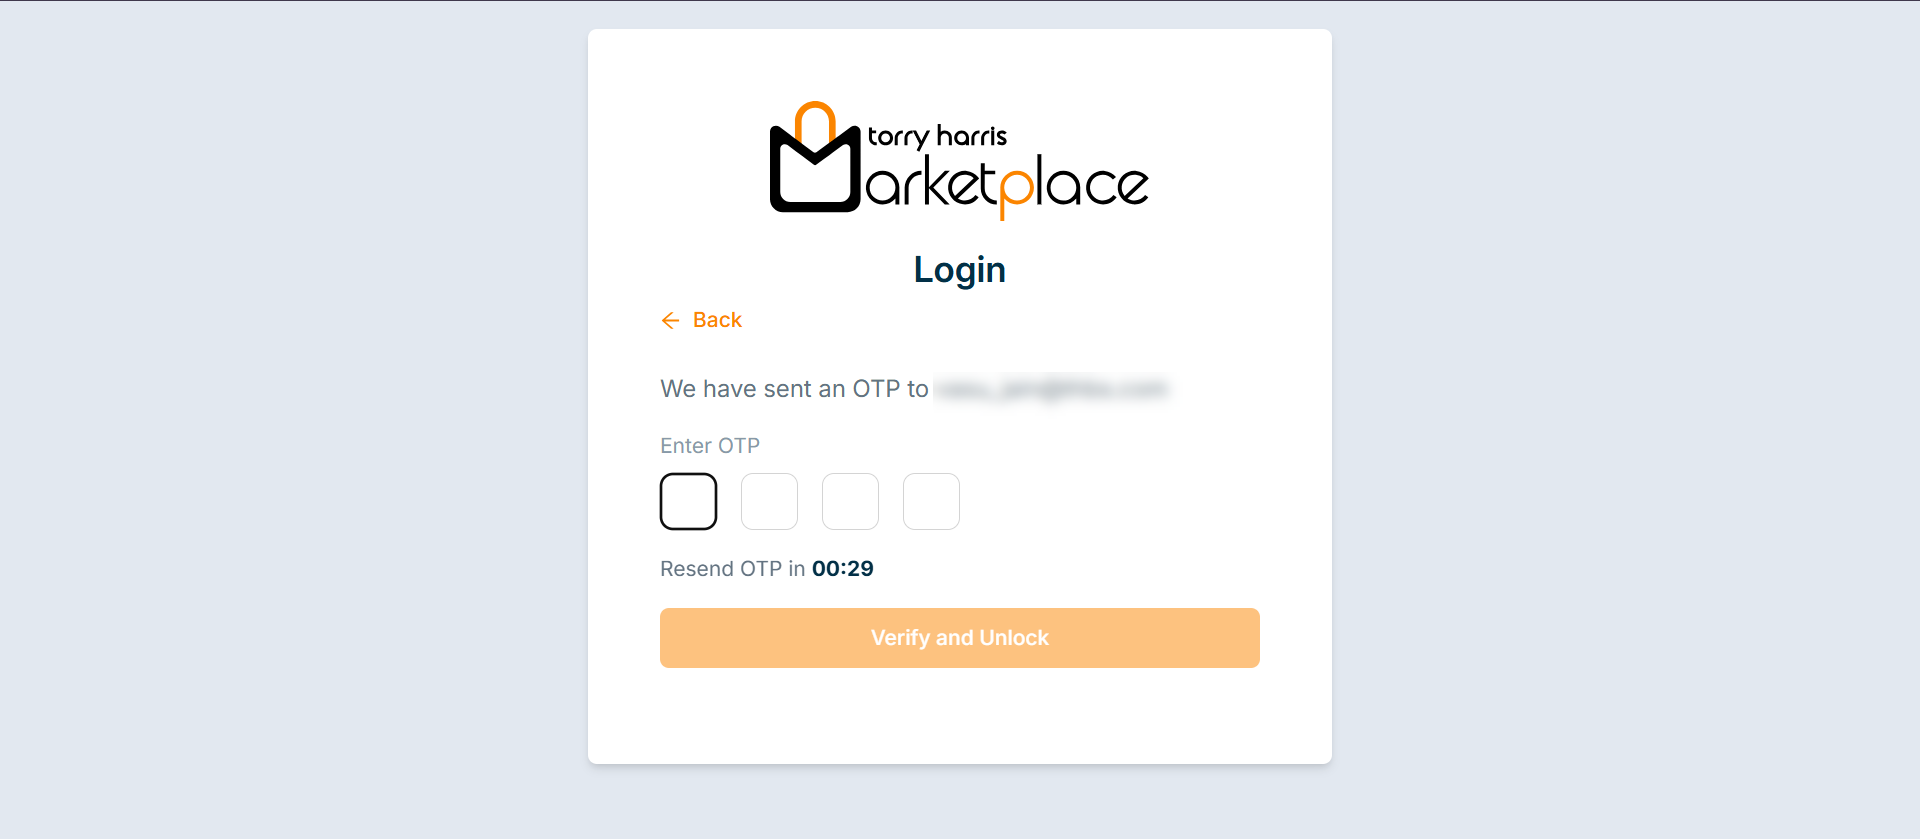
- Click Verify and Unlock.
The Verification Successful screen appears as shwon below
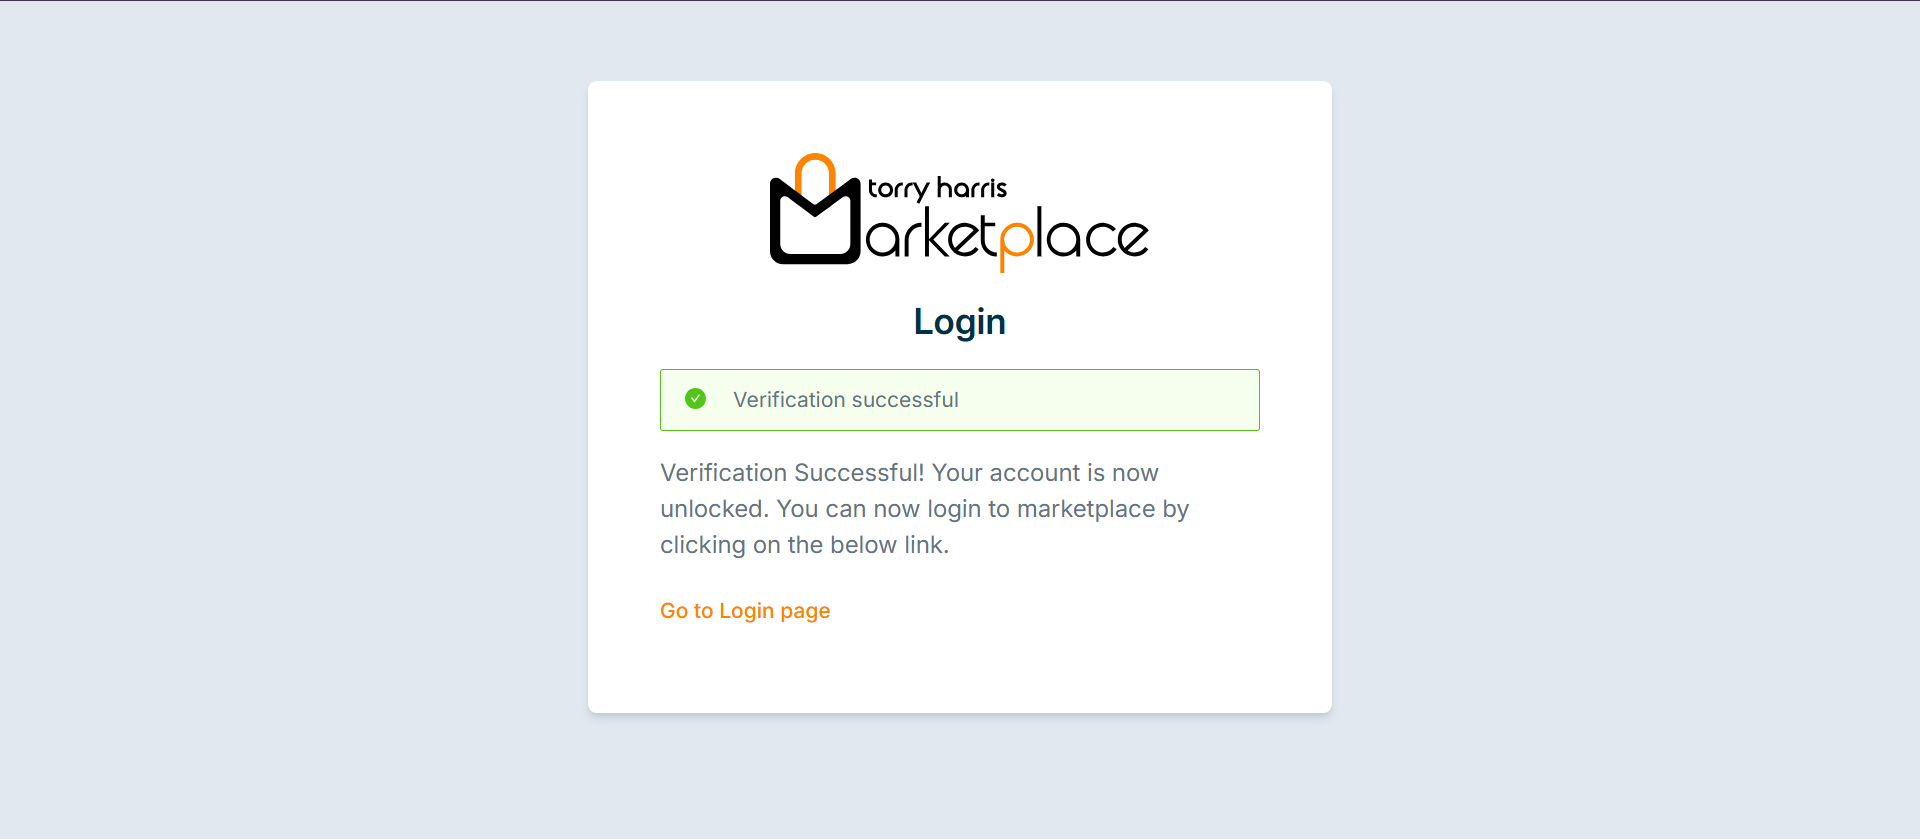
- Click Go to Login.
Admin Unlock on Request
Vendor manually unlocks the account upon user's request.
- Click Admin Unlock on Request dropdown.

- Enter Minimum Lock Duration Before Requests between 10 to 30 minutes.
On saving, the confirmation message appears as shown below.
On the login page, if incorrect credentials are entered repeatedly, the Too many failed attempts screen will appear as shown below.
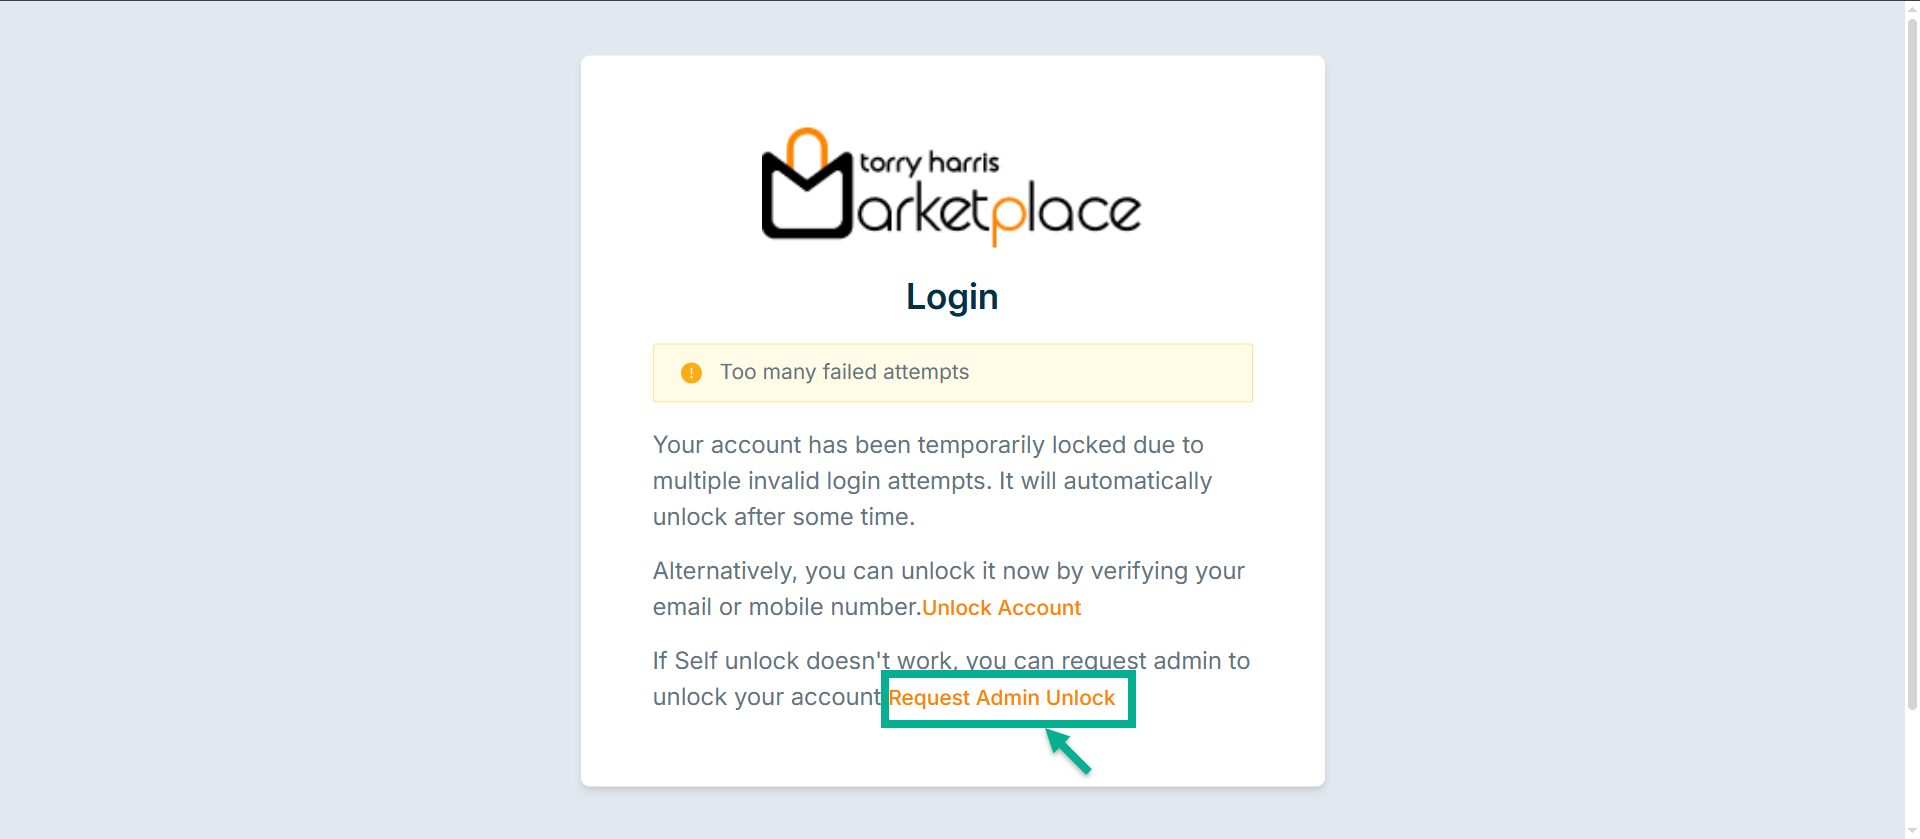
- Click Request Admin Unlock.
The Reason for Request screen appears as shown below
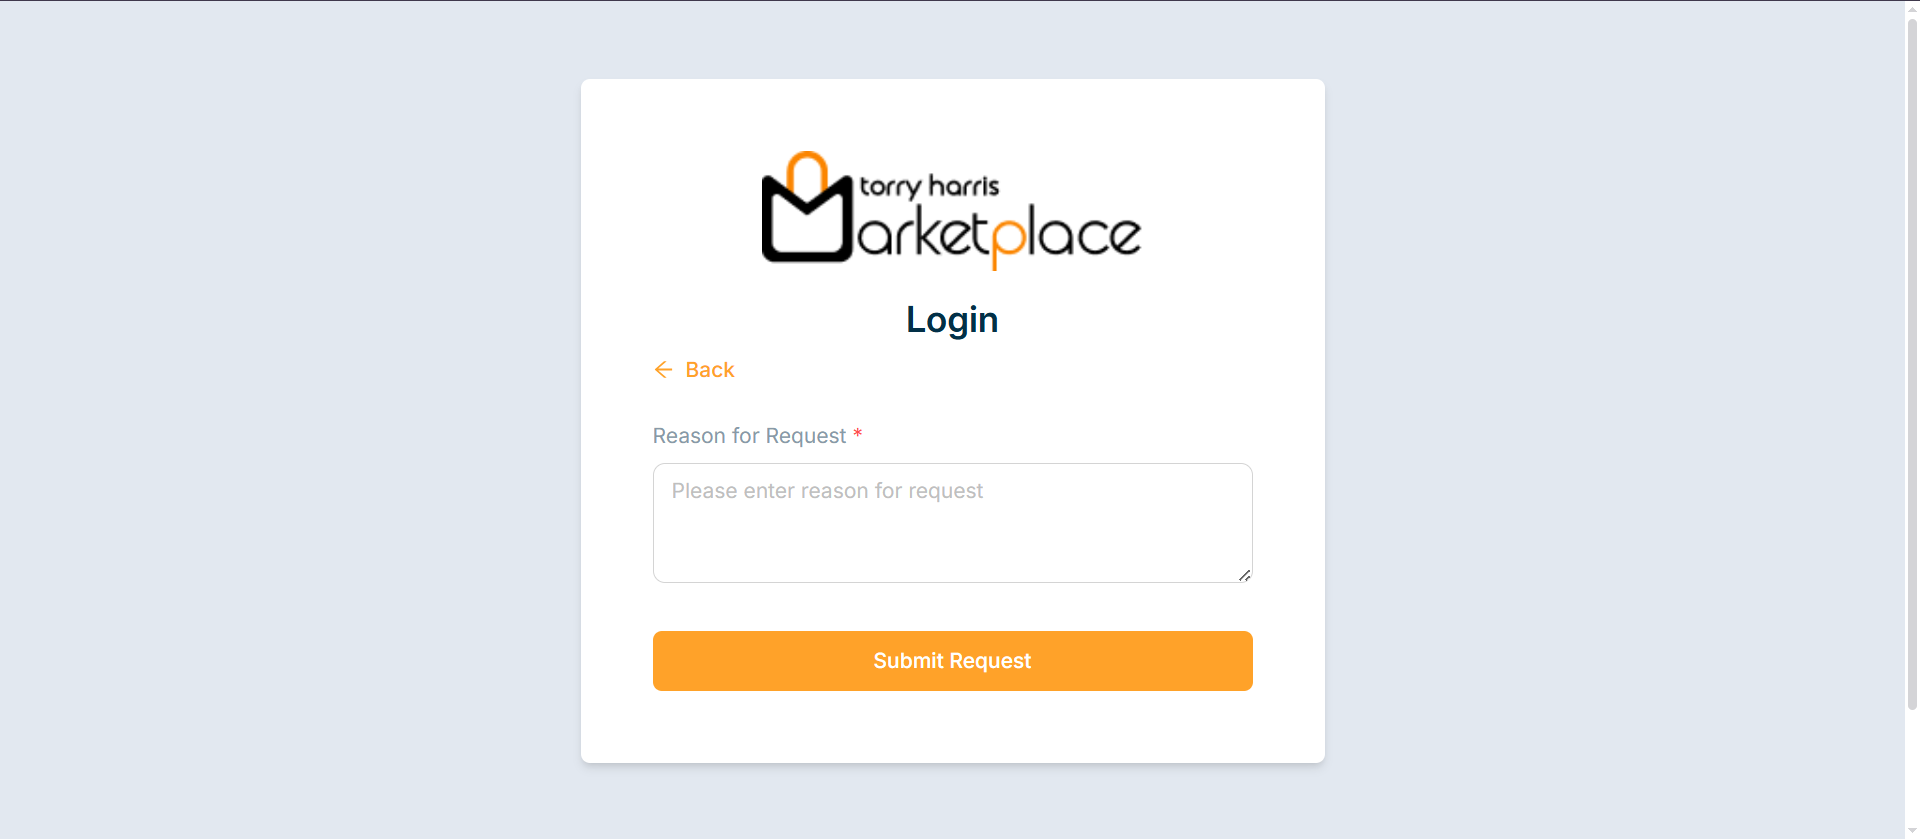
-
Enter Reason for Request.
-
Click Submit Request.
The Unlock Request screen appears as shwon below
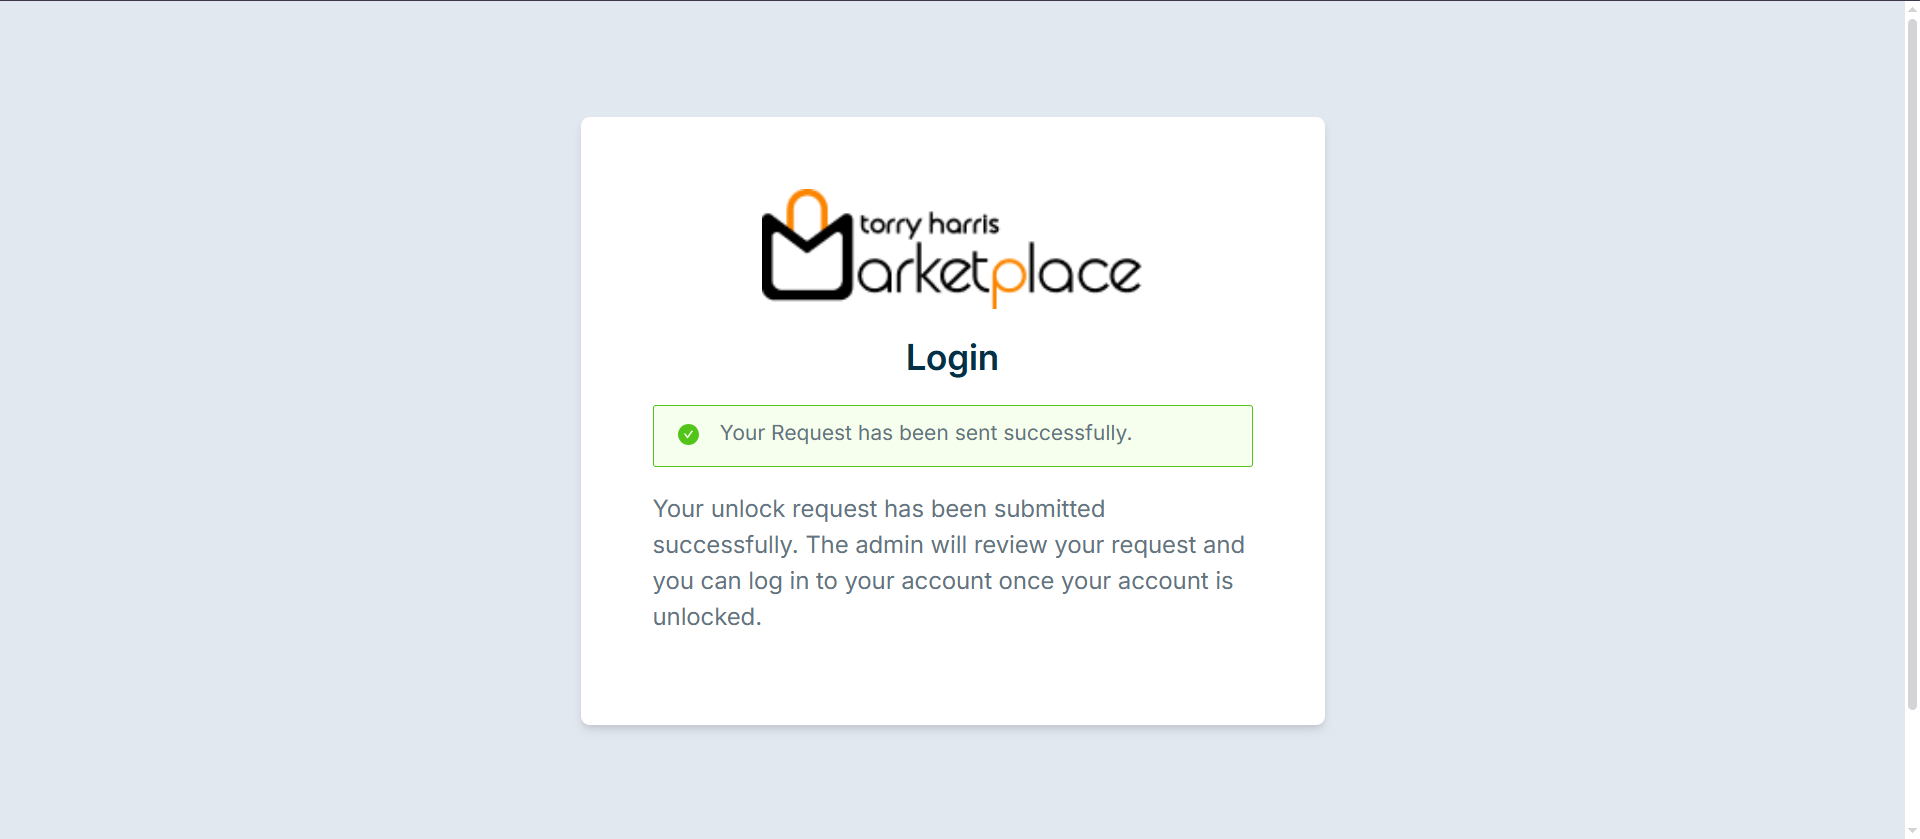
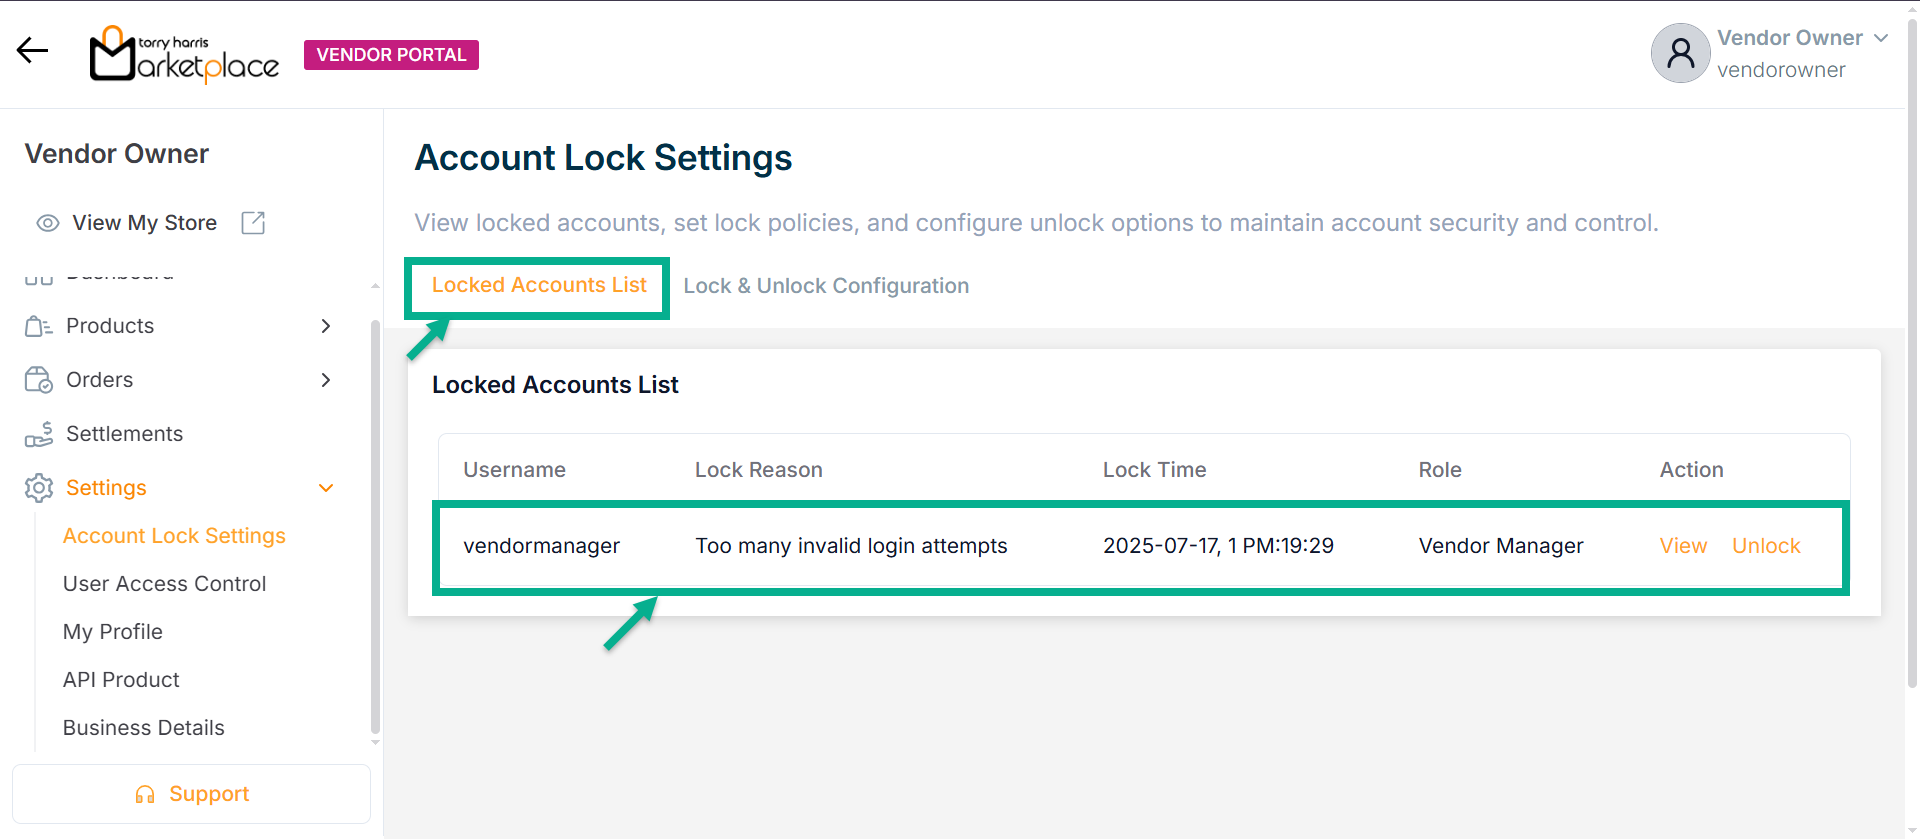
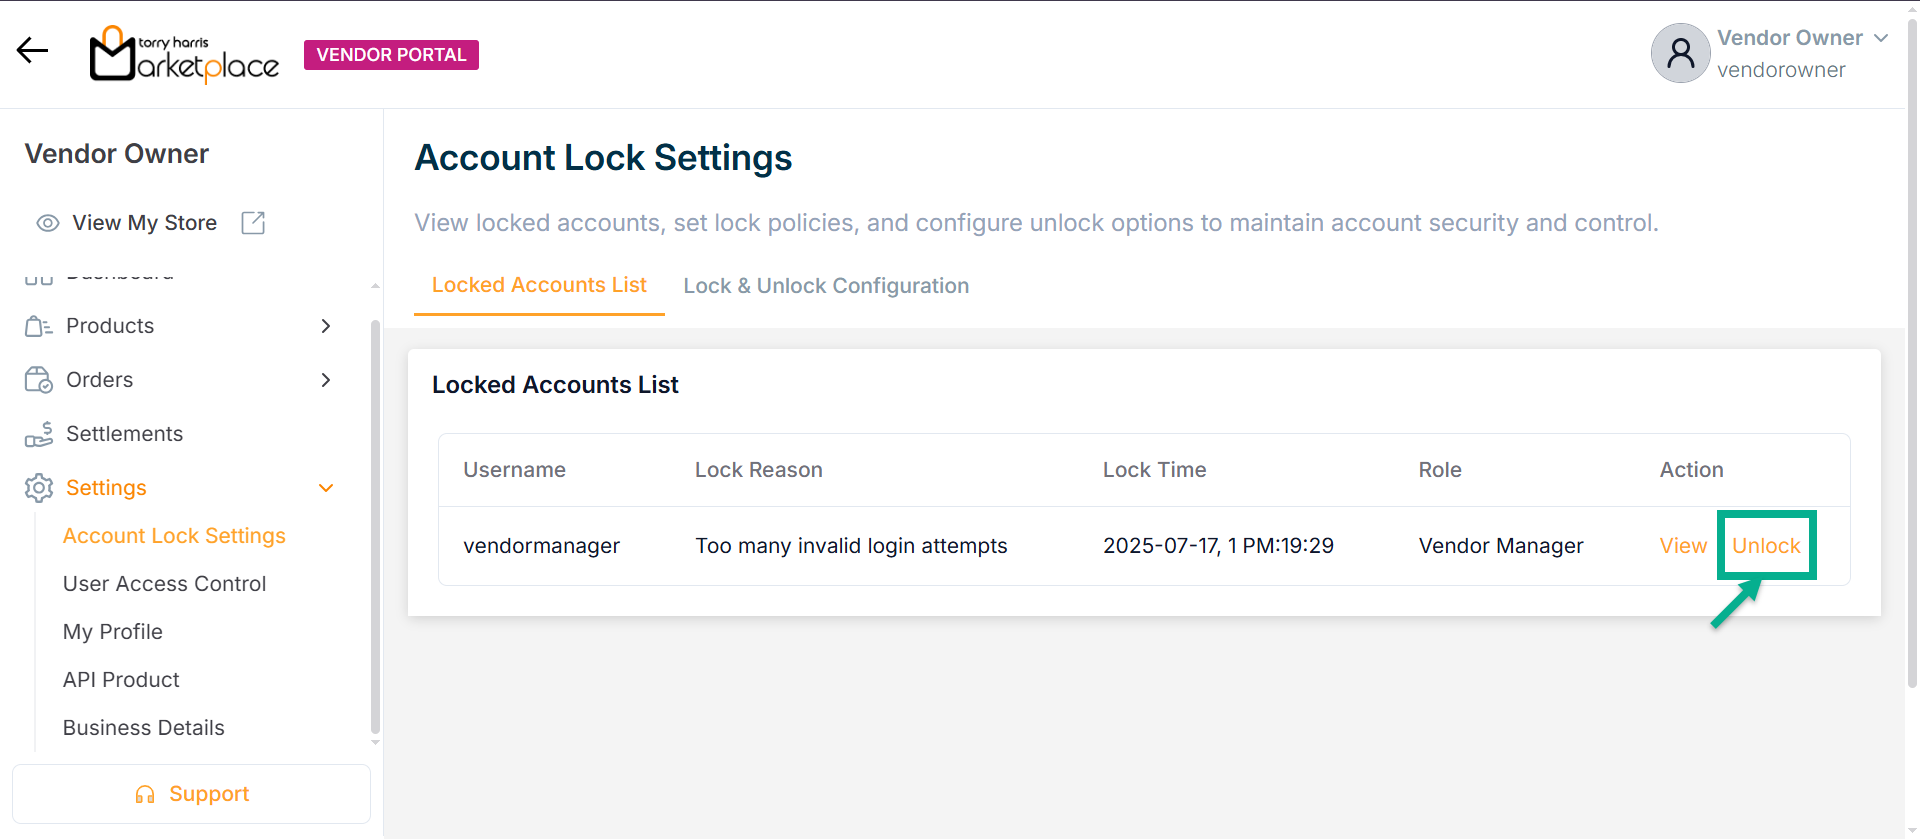
The unlock request will appear under the Locked Account List.
The Locked Account List screen appears as shown below
Viewing Locked Account Details
- Click View.
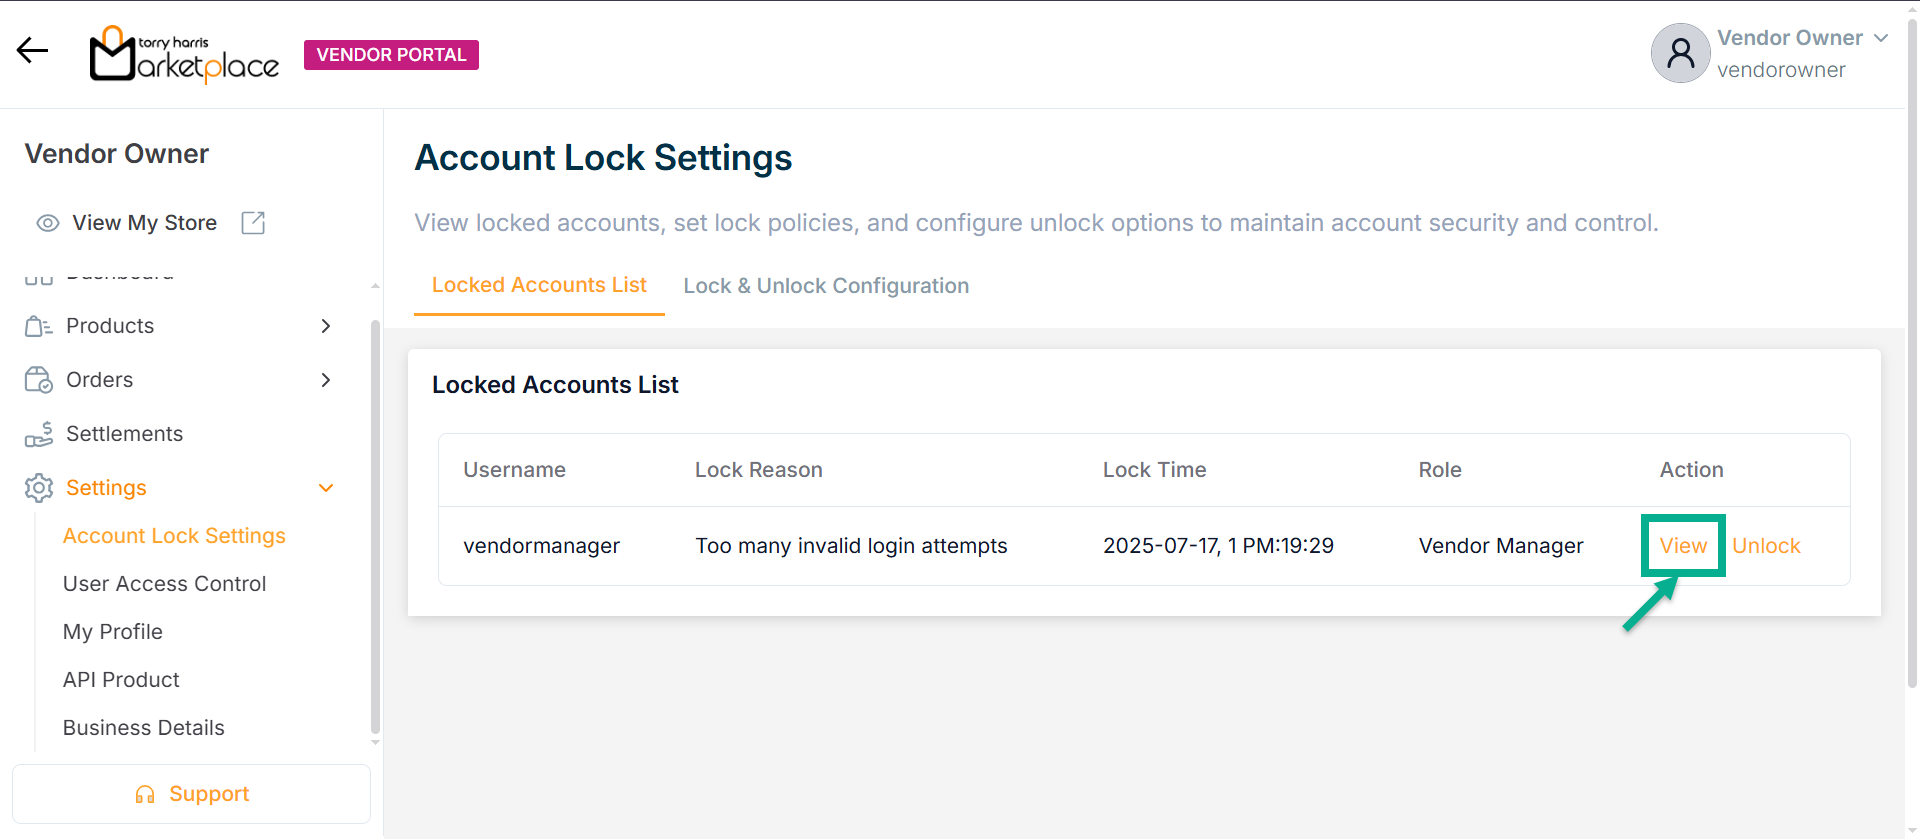
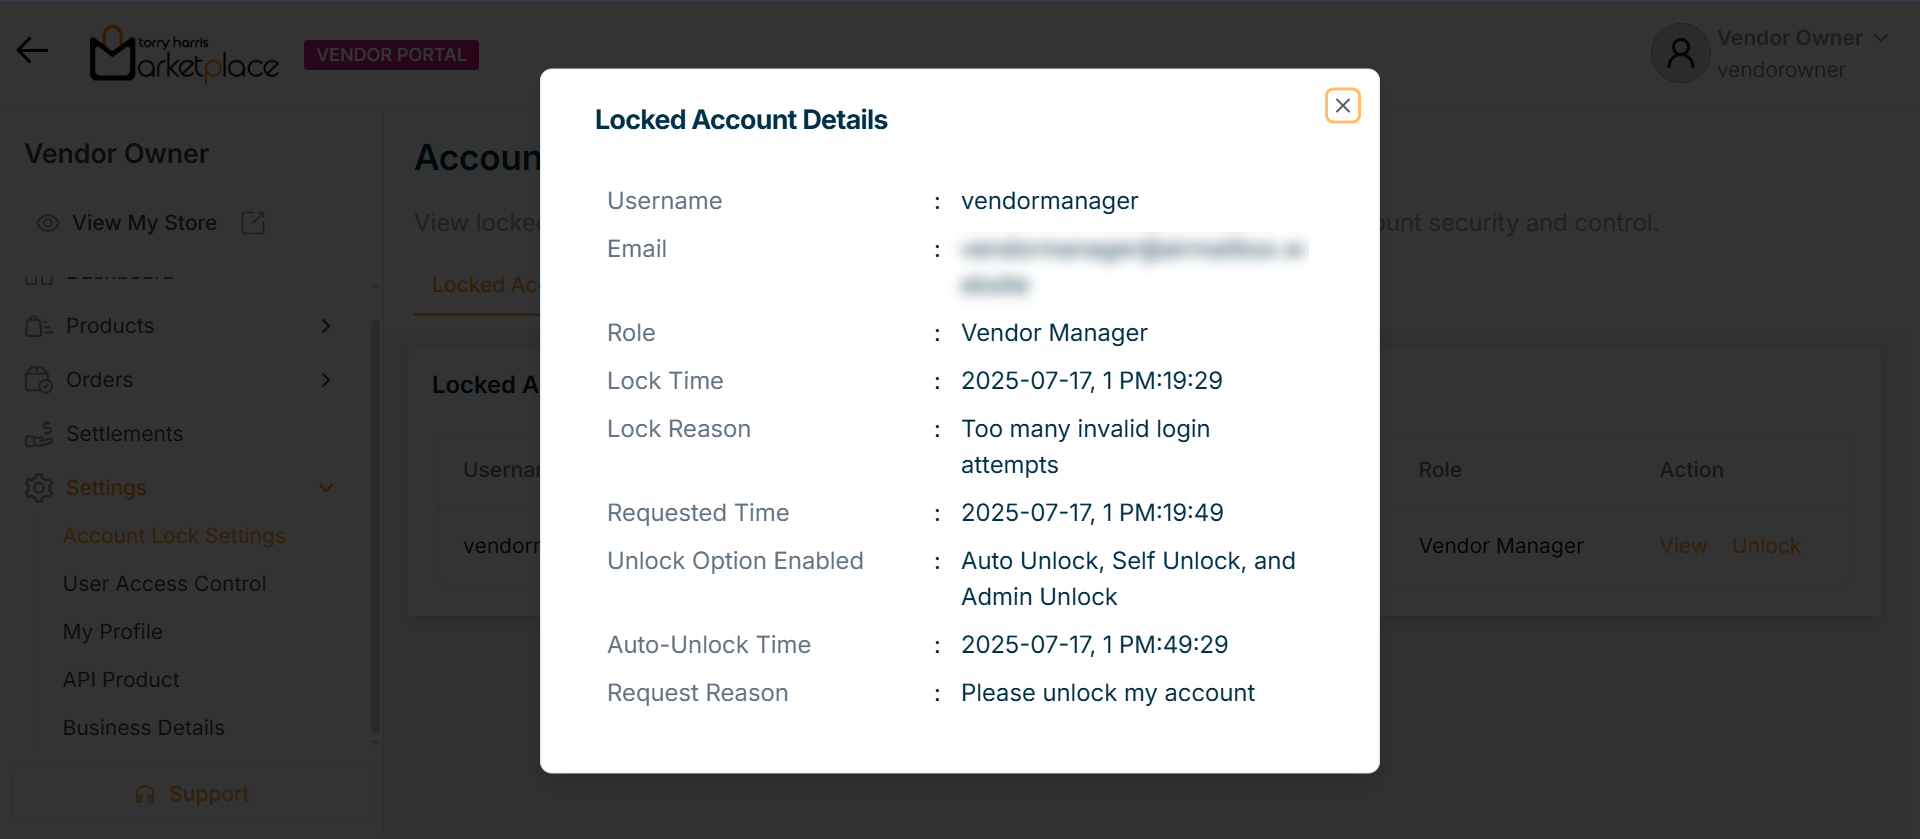
The Locked Account Details dialogue box appears as shown below
Managing Unlock Request
- Click Unlock.
The Manage Unlock Request dialogue box appears as shown below
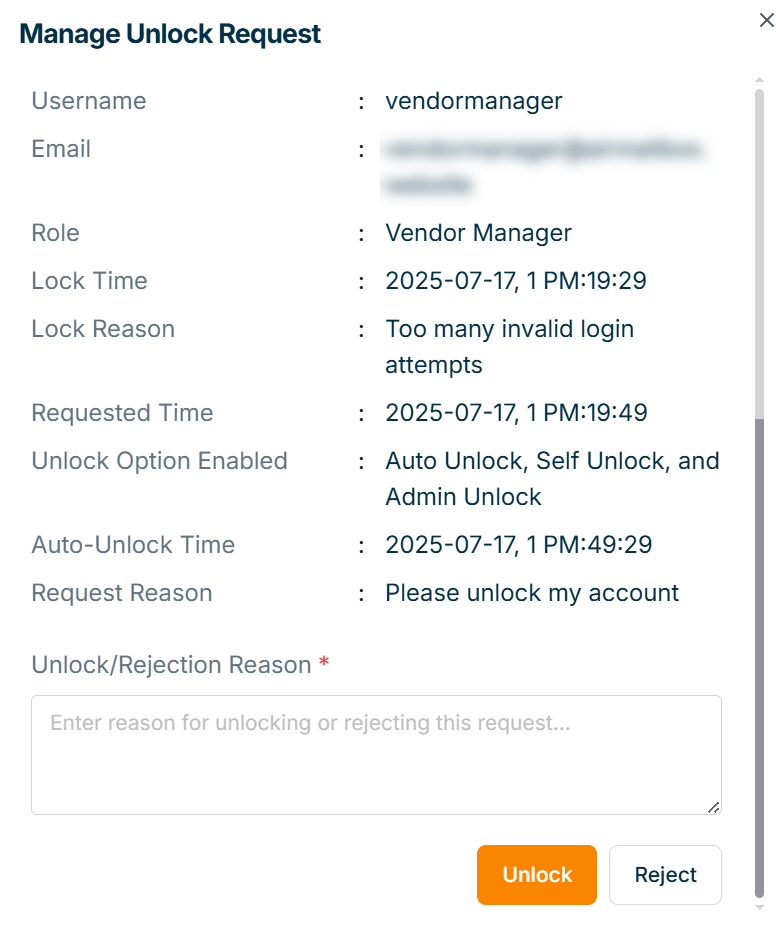
- Enter Unlock Reason.
Click Reject to decline the unlock request.
- Click Unlock.
On unlocking, the confirmation message appears as shown below.
